Day 73: OK, all youse geniuses! Help!

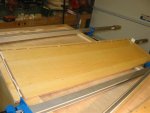
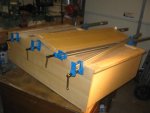
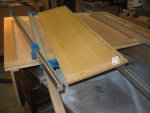
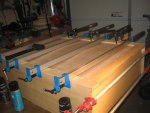
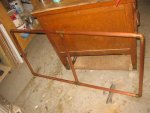
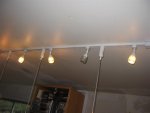
OUCH! Well, I got the pot rack down, and got it cleaned up. What a scene that was. And I got the worst cabinet down, and performed surgery on it. What's that they say about never having enough clamps? ;)

Oh, and James got hold of the camera again... ;)

whoops 001 (Medium).jpg

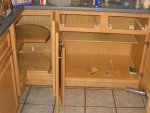
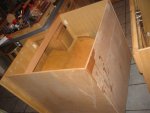
The cabinets are all wood, but they came in boxes and just clipped together. Looks like glue is going to solve the problem...

whoops 002 (Medium).jpg

whoops 003 (Medium).jpg

whoops 004 (Medium).jpg

whoops 005 (Medium).jpg

I cleaned off the copper with naptha. Then I sanded to get it shiny again. Then I experimented with three types of finish. Keeping them bright and shiny is truly problematic! I tried lacquer, polycrylic, and polyurethane (all from rattlecans I had sitting around). I have to find a better way to really clean it, and then settle on some kind of finish. I'm open to all suggestions for keeping that bright brushed copper look....


whoops 006 (Medium).jpg

whoops 007 (Medium).jpg

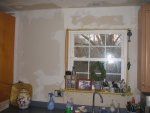
But the big problem: after long discussions, it's been decided to go for the full monty: pull all the cabinets, uninstall everything, pull the wallboard. That'll give me a chance to finally make sense of the wiring, and actually insulate the exterior walls (believe it or not, there's presently no insulation).

She's also decided to replace the countertops. So it's off to go choose tile...

whoops 008 (Medium).jpg

Stay tuned! ;)

Thanks,

Bill
 
Looking into the future........ my crystal ball is clearing......... yes......there it is....... I see postings titled "day 114 - I finally figured out the wiring, but my hair is still smkong":rofl::rofl:

Bill, looks like the proverbial can of worms, or Pandora's box. :eek: Good luck my friend!
 
But the big problem: after long discussions, it's been decided to go for the full monty: pull all the cabinets, uninstall everything, pull the wallboard. That'll give me a chance to finally make sense of the wiring, and actually insulate the exterior walls (believe it or not, there's presently no insulation).

It's been decided? (She decided right) :D :rofl: Sounds like a good decision, will be able to put up a moisture barrier too. Good updates...keep them coming.
 
Dear Bill's patient and gracious wife...

I know you read over his shoulder. Please forgive him, because there is no way, short of a serious miracle, that this is going to be completed before Christmas. :( :(

Seriously, Bill. Just how much vacation did you book off? Emptying Cabinets. Removing Cabinets. Repairing Cabinets. Removing drywall. Figuring out Wiring. Adjusting Wiring. Insulating. Installing vapour barrier. Reinstalling drywall. Mudding and Sanding. Priming and Painting. Reinstalling Cabinets.

(At this point we're at day mumble-mumble of this project already by my estimation, and he hasn't even started on the crown molding that was the catalyst of this!?)

So, where are you going for Christmas dinner?

...art
(who laughed at the "Heather" story, in part because I'm married to a Heather... :wave: )

ps: It's going to look great when it's done.
 
I'm thinking that pot rack is made of "hard" copper pipe, right? That has brass in it to harden it. Back when I was in the military, our brass dress uniform accoutrements came with a coating of shellac that helped them resist tarnishing while they were waiting to be issued/bought. Of course, first thing we had to do was to strip that shellac off (and not knowing it was shellac at the time, never thought to use alcohol on it, that was for drinking) so spent a whole lot of time with Brasso and a rag so that the brass would forever after be in need of regular polishing with Brasso.

You might try putting a coat of shellac over that pipe. Zinnser Sealcoat is what I'd try as the regular stuff they have has a bunch of other crud in it to prolong it shelf life.
 
Looks like you are moving forward and I think it helps that you only need to glue up the existing cabinets. You should save time there. I like the look of those new clamps.

Personally I think you are on the right track doing the full monty. The existing wallboard looked really bad and it would have been difficult to try and fix it. Better to start over from scratch and do it right. No insulation? How old is your house?
 
Sounds like a fairly typical home improvement project...they tend to snowball as they go.

You mentioned new countertops and tile in the same breath. Have you (or Doorlink) used tile countertops before? I've had them in two houses -- including our present house -- and I don't like them. Things like cutting boards and plates won't sit flat, to they rock around when you're using (cutting on) them. The grout also makes keeping things clean tougher, IMHO. Tile countertops look cool, but are a pain to use for me.
 
What Vaughn said. We had some in a house we rented many years ago. A real pain to work on and clean. Go with solid surface. A little more money up front, but will pay dividends down the road.
 
Bill,

Since you are planning on taking down the old drywall. Have you considered installing the new drywall horizontally? You wouldnt have the butt joints to deal with. Are the walls tall enough to do this? Just a thought.

Also, since you would have the walls bare might want to install some blocking for the cabinets it you dont already have some.

blocking.jpg

Randy
 
Last edited:
You might try putting a coat of shellac over that pipe. Zinnser Sealcoat is what I'd try as the regular stuff they have has a bunch of other crud in it to prolong it shelf life.

Jerry,

I'll try that. It's funny, as I was cleaning off the copper I thought of you, since one of your posts is what first turned me on to naptha. I have to figure out how to really bring out the brushed copper look first. I was sanding with 220. Maybe I should try a wire brush on my drill?

Looking into the future........ my crystal ball is clearing......... yes......there it is....... I see postings titled "day 114 - I finally figured out the wiring, but my hair is still smkong":rofl::rofl:

Arrgh! Truer words were never spoken. It gets worse: we traipsed around to several stores yesterday, and she finally found some tile she liked. Estimated delivery time: four weeks. But the good news: she found similar stuff on ebay, so maybe we can cut that time down, and get a much better price...

It's been decided? (She decided right) :D :rofl: Sounds like a good decision, will be able to put up a moisture barrier too. Good updates...keep them coming.

Darren,

Exactly! I long ago gave up on the idea of having any say in the process! ;)

Seriously, Bill. Just how much vacation did you book off? Emptying Cabinets. Removing Cabinets. Repairing Cabinets. Removing drywall. Figuring out Wiring. Adjusting Wiring. Insulating. Installing vapour barrier. Reinstalling drywall. Mudding and Sanding. Priming and Painting. Reinstalling Cabinets.

(At this point we're at day mumble-mumble of this project already by my estimation, and he hasn't even started on the crown molding that was the catalyst of this!?)

Art,

But wait! There's more! Drawers to make, cabinet doors, in cathedral style, an island to completely tear apart and rebuild... :doh:

I'm off till the fifth of january. I've got my fingers crossed. I think there's time, but the worst part is that I'm a complete doofus (so everything takes twice as long as it should) and I'm lazy to boot!

I spend a lot of my work day estimating how long projects will take. One of my colleagues has a standard rule: 'Decide exactly how long something should take. Double that, and add an order of magnitude.' So, what should take one day, go to two days, and change the day to a week. Thus, a one day project takes two weeks... ;)

Oh, and I can't imagine being married to Heather! That would be heaven on earth! ;)

Personally I think you are on the right track doing the full monty. The existing wallboard looked really bad and it would have been difficult to try and fix it. Better to start over from scratch and do it right. No insulation? How old is your house?

Bill, the house dates to 1963. I'm used to working on older houses, this one's a little too new for me. The shell is concrete block, with a brick veneer done with full sized bricks. NO insulation in the walls, except what I've put in as I go. The whole kitchen was gutted as soon as we moved in. The wall board was so bad I just slapped some 1/4" luann behind the base cabinets. Should've ripped out all the wallboard back then. My only excuse was that we had a newborn, and we needed something fast. Besides, I know a lot more now than I did then...

Vaughn, Tile counter tops are a west of the Mississippi thing. We use granite here in Northern Virginia.

Vaughn and Frank,

I like tile, because it reminds me of my long lost homeland. In San Diego, if we were redoing a kitchen, we'd just jump in the car, go down to mexico, and buy a bunch of tile for next to nothing. Besides, I can do it myself... I'm just not set up for granite work, marble would degrade with boys around spilling limejuice, and try as I might I can't talk Doorlink into soapstone. And anyway, everybody has granite around here... it's such a cliche! :rofl:

I want to edge it in maple... but we're still discussing that one, as someone she was once fond of had exactly that, and she's worried it would remind her of that person. Rationality, as you can see, went out the window long ago... :rolleyes:

Bill,

Since you are planning on taking down the old drywall. Have you considered installing the new drywall horizontally? You wouldnt have the butt joints to deal with. Are the walls tall enough to do this? Just a thought.

Also, since you would have the walls bare might want to install some blocking for the cabinets it you dont already have some.
Randy

Randy,

What a great idea! Cabinet blocking! I wouldn't have thought of that! Keep those ideas coming! :thumb:

This has been a fun post to read!!! It's like "AS THE WORLD SQUIRMS:rofl::rofl::rofl::rofl:"

Royall,

See, I'm not only amusing in my own person, but I'm the cause of amusement in others! :p

The upper cabinets and their contents are down and stored. Lower cabinets, dishwasher, sink, and countertop coming out today. oh, and the oven, and the fridge cabinet. maybe the drywall. More pics coming...

In my mind, I keep singing that old Kinks song "Demolition"

"I see a little thatched cottage
Looking so neat
With compulsory purchase we
can buy it up cheap.
Then we'll pull up the floor boards,
Knock down the walls,
Rock the foundations,
Until the house falls."

http://www.youtube.com/watch?v=32Ks4ixsMOY


Thanks,

Bill
 
Last edited:
bill, this thread is great. i'll be watching.

oh and i am a terrible estimator of how long tasks take, but i think you can do it. hope that makes you feel better....
 
Quote:
Originally Posted by Jerry Palmer View Post
You might try putting a coat of shellac over that pipe. Zinnser Sealcoat is what I'd try as the regular stuff they have has a bunch of other crud in it to prolong it shelf life.
Jerry,

I'll try that. It's funny, as I was cleaning off the copper I thought of you, since one of your posts is what first turned me on to naptha. I have to figure out how to really bring out the brushed copper look first. I was sanding with 220. Maybe I should try a wire brush on my drill?


How about green Scotchbrite???
 
It's been decided? (She decided right) Sounds like a good decision, will be able to put up a moisture barrier too. Good updates...keep them coming.

Darren,

Exactly! I long ago gave up on the idea of having any say in the process!


I've come to the conclusion that the reason my wife makes me go with her to look at stuff for the house is so she knows absolutely what not to get. She'll show me, say, two or three different curtains and ask which ones I like, then invariably chooses a different one. Even if she's not really looking to get something then, she always makes it a point to say she prefers a different one than what I chose. :(
 
...I was cleaning off the copper ... I have to figure out how to really bring out the brushed copper look first. I was sanding with 220. Maybe I should try a wire brush on my drill?...Bill

Bill,
Instead of sandpaper or a wire brush, try using coarse steel wool. It'll shine up and add 'brushed look' scratch marks to the copper.

BTW, I generally use 4-0 steel wool to clean up copper pipe before soldering. It does a nicer job than sandpaper.

Once you've got the copper cleaned/shined, use the naphtha to remove any oily residue, then shoot it with clear lacquer. Plain old 'rattle can' lacquer will do a nice job - way better than shellac.
 
The easiest and fastest (for me at least):dunno: way I've found to clean up (and give a brushed look) to any metal tubing is clamp it in a horizontal position on saw horses (or similar blocking) and use an 18" strip of 1" to 2" wide Emery Cloth and use it like you were shining shoes. (I try different grits for the final stroke or two to get the BRUSHED Look that I like). Do the top half and then turn it over and do the bottom half. I've always coated it afterward with lacquer, (but may have to try the suggested shellac next time).:D
 
Bill,

We need pictures!! How are we expected to help you and Heather without being able to see whats going on?:D

Randy

Oh, boy. I'm dog tired. but I've gotten some stuff done:

whoops 005 (Medium).jpg

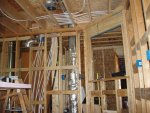
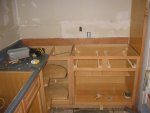
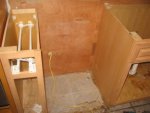
These are all various stages of cabinet and countertop deconstruction. Yikes.

whoops 006 (Medium).jpg

whoops 007 (Medium).jpg

whoops 008 (Medium).jpg

whoops 014 (Medium).jpg

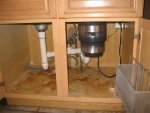
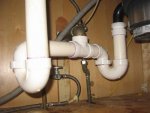
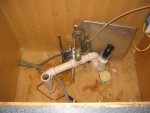
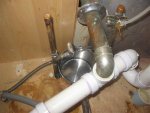
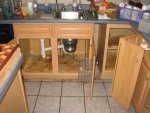
The worst part, of course, was under the sink cabinet. I had redone some stuff, but not everything. Last night, I had to just recap the pipes, as they don't have shut off valves where they connect to the sink. I'll fix that when the cabinets are still out of the way.:dunno:

The dishwasher *did* have an ancient shutoff valve. Of course, it didn't work. So I was at the despot at 9 pm last night, getting a new one. This morning, when I went to put it on, The old valve wouldn't come off, instead then stem came out of the T. Luckily, I had some 1/2" copper out in the shop (though it took me a while to realize it and then to find it (you wouldn't think eight feet of copper could hide anywhere, but you'd be wrong... ;)

Anyway, that solved that problem. Next problem, cabinets were too big to get out! I put them in before I built the island. Too big to lift... ended up disassembling them all! That took a little while! :doh:

whoops 015 (Medium).jpg

whoops 016 (Medium).jpg

whoops 019 (Medium).jpg

whoops 020 (Medium).jpg

Bad stuff coming in the next post...

Thanks,

Bill
 
Top