Coolmeadow Creations Shop Construction

We'll see. I can get the same stuff, Lowes and HD will order it. About 80.00 a sheet. Or I will try the distributor, and maybe at least save the 20.00 delivery fee. But it's a current style and finish, so I can wait (Here I go again:D) for a while to go get it. Or go another direction altogether. I would like to have a real wood assembly table with vises and dog holes. Maybe this will be where that gets built, and let it double as the outfeed table. It is a straight shot from there to the future assembly/finishing room. The router table will live on the side of the saw that it can be used for the infeed table for sheet goods. I did that already cutting the MDF for the top, and it worked ok. Will be better when there is some weight on it so it doesn't slide on the feet so much. Right now it is so light that the Herc-U-Lift wants to keep the wheels engaged, even though it's in the down position.
After cutting 2 of the apron stringers for half lap joints when they weren't supposed to be :doh::doh::doh::doh::bang::bang::bang::bang:, I've recut new ones, got them set up, and started trimming the miscut ones for extra bracing on the inside just because most of the cuts are already made.;) I can already tell I probably won't get the laminate on today. Still need to cut the hangers to mount the top to the table and glue them to the bottom piece. a couple minor trims to make on one piece of bracing, then take it all down and glue and screw it back together. Then I can go back to the top.
Thanks for the encouragement! Jim.
 
As always, I didn't get as far as I wanted to. Too many redo sessions today. Couldn't even remember to look at the numbers I put on each piece for where it was to be mounted. Glued and braded several half laps before I caught the problem, :doh::doh:then had to rip them out. :bang::bang: Glad I caught it quick before the glue had time to set up.
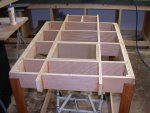
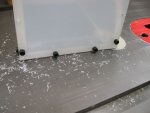
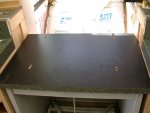
This first picture is the base with the top frame on top. The stained legs are the part that I salvaged from the 2 story dog crate stand from the old house. Had to add the stretchers on top to get to the height I needed. Bracing is all half lapped, glued and bradded. Couldn't stretch the base out farther because of the limits of the Herc-U-Lift. It is jury rigged now to get it this big! DSCN1676.jpg
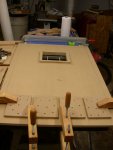
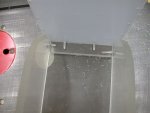
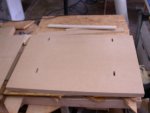
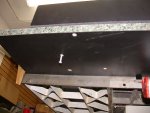
This second shot is of the bottom layer of the table top. DSCN1677.jpgI had to piece it together to get it all out of 1 sheet of MDF. I doubt that it will be a problem. I had to piece together the torsion box tops for the multistation tops and they did fine.
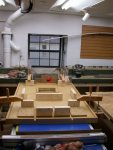
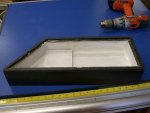
The last shot is of the top section. DSCN1678.jpg I still need to put the edge on it, and then laminate the edge and top. Then cut in the ledge for the PRL to sit on. I plan on taking one afternoon off from work this week, then I also have next weekend. Still need to try my idea out for the cord. Lots of things to finish up.
Hope you had a good weekend! Jim.
 
Didn't get much time this weekend, even though I was off. Had to help with a dog rescue event the first part of Sat, and do some shopping for clothes for the new job. I've got the 2 layers of the top glued-screwed-and drying. Also got a coat of poly on the underside since it was strapped down to the table saw and couldn't run away DSCN1687.jpg....wait a minute. I was thinking of bathing one of the dogs. Never mind. :D Forgot to put a coat of poly on the dust box while I had the poly open. I'll do that after the game. I also need to work a little more on how the dust chute will attach. I've been thrown a little curve, but I think I can make it work.
Hope you all had some time in the shop, and/or otherwise had a great weekend! Jim.
 
Last edited:
Thought I'd report what I did this weekend on the router table. I know there aren't any pictures here of the finished top, but you can look at my "I'm ticked off" thread for pictures. Actually, one I'm posting in this might show the top, a little. Like every other flat surface in the shop, it has "stuff" all over it!:huh:
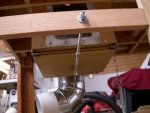
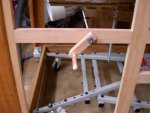
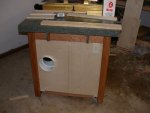
Don't know if I mentioned here or not, but following the good reports of a guy at SMC, I modified my router cabinet to be a top side draft design. Fresh air will come in at the bottom so that the motor of the router is breathing fresh air. We'll eventually see if that was a good idea or not. If not, it is easily changed. I also made the opening at the bottom have a sliding door so that I can control how much air is getting in to make the flow work best. I rigged a threaded rod DSCN1731.jpg through a tapped L bracket on the sliding door, and out the front. DSCN1733.jpg I made a crank handle out of a scrap piece of oak, and some hard wood dowel (not sure of the species). DSCN1734.jpg Works great! And the door slides very smoothly.
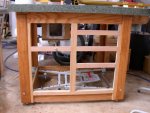
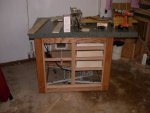
Yesterday I put in the rails and stiles to show where the doors and drawers go. DSCN1730.jpg The top 3 openings on the right side will be drawers. The very top one is shallow to hold the Incra guide book and templates. The next 2 are for bit storage. The lower one may be a door with a bin on the back...haven't decided yet.
The 2 spots on the left side will be doors with bins attached to the back, and will allow access to the air inlet to change speeds on the router if need be. I need to get some oak boards to make drawers and doors from, and some oak ply to finish off the other 3 sides and to lend some strength to keep it all from racking as much. It's not bad, but it's not solid either. I'll have to leave about 12" or so on the right side at the bottom open so I have access the Herc-U-Lift for the mobility aspect. Then finish staining and put a few coats of finish on it. It's a little rougher than what I wanted. A few things didn't go as planned, but I think it will be a serviceable table for a few years.
I picked up 2 sheets of birch ply at HD this afternoon to make drawers out of. I want to learn to do the dovetails so that I will have that fairly solid when I start the bathroom vanity project. I mean, that's what all this equipment is for! Have a great week! Jim.
 
Last edited:
Thanks Joe! I know not everyone will comment each time they read, and sometimes no one will comment, but that's ok. I get to chronicle what I'm doing.
Well, I worked last weekend a little on learning to do dovetails on the Incra fence system. Very enlightening!!! I did a through DT box yesterday in 1/4" MDF. I had tried to do it in 1/2" baltic birch and it was a horible mess. Then I found out why....can't do it with a 1/2" DT bit, and that's all I have right now!:eek: I'm still having a little issue with centering the board, but I think I'll be ok.
Also yesterday I made a template for an over blade pick up for the TS. Cut 2 pieces of 3/8" plastic of some sort (left by previous owner) and sanded the edges smooth and to match. Had to fuss with the bandsaw to get it to work. I think I was trying to over tension the blade. Anyway that took a little while to straighten out.
Today, I messed around this am in the house, went out to HD and Lowes to get some supplies, came back and ate lunch then worked about 2 hours in the shop before the Cowboy game, then about 2 hours after the game. What did I do? Rewired the TS for 220 operation, and started putting the OH pickup together. DSCN1758.jpgDSCN1759.jpg
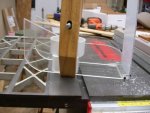
As this last picture shows, I didn't pay enough attention to drilling the holes perpendicular to the surface. DSCN1760.jpg But it will work. The piece of plastic I'm attaching with the screws is a piece of PTEG I got from Ed Morgano. It should bend nicely for the curves. After I get it on, I'll take it all apart and pull the protective film off, and epoxy it as I reinstall the screws. The piece in the middle is the hose pick up. It is a 4" SD2729 PVC to 3X4 downspout adaptor. Add a short piece of 4" PVC, and the flex hose will hook right up! The 3X4 lip will need to be cut off some, and I'll epoxy it into place at the front edge.
I looked for some aluminum square tubing that one size would fit snuggly inside the next size up. Neither HD nor Lowes had anything like that. I would like the mount to slide up out of the way without having to take it apart each time. I'll have to play with that.
Hope you all had a good weekend! Monday is just a good night's sleep away! :wave: Jim.
 
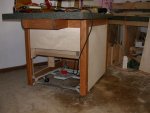
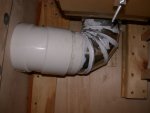
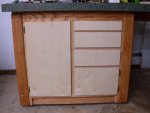
Well, here is an update on the router table. Last week I installed some 1/2" BB ply on the two end sections... the short side with the 6" dust collection hook up, and the half piece for the end to allow access for the Hurc-U-Lift. One night during the week I prepped for the big flat side to get mounted, so did that Sat am, as well as build the drawers, cut out last weekend, and decided how to build the stringers for the runners to mount the drawer slides to. Since I wanted this up and running before I could afford all the different pieces and because I was trying to utilize some salvage parts (the 4 legs), it was not designed from the beginning on how some of the things would work.:doh: Improvision was my friend on this. But it works, and the sides have made the entire table set up much more solid that it was. I am very happy with that change.
The first picture is of the drawers. DSCN1809.jpg
The second is the end with the master switch and the dust hookup. DSCN1810.jpg
Number 3 is the other 2 sides. DSCN1811.jpg
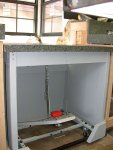
And the last is of the ductwork inside the cabinet. DSCN1812.jpg

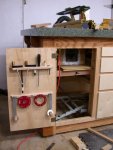
Next up is making the drawer fronts and the doors for that one side. I'll work on that as time allows this weekend. Then I need to find some stain that gets the BB ply close to the color of the oak pieces. I'm not worried about it being exact. Then put a few finish coats of poly on to protect it. Somewhere in there I'll work on making the router bit holders for the 2 larger drawers. The short drawer is for the Incra book and templates. I also need to build some sort of tool caddy in one of the doors.
Thanks for looking in! Jim.
 
OK, now it's ready for stain and clear coating. Mounted the doors Sunday, and drawers yesterday evening. DSCN1820.jpg I cut the wood for the tool racks yesterday also, but decided how to mount them, and shape the edges slightly, this evening. DSCN1821.jpg I also moved the crank handle for the "blast gate" for the intake at the bottom of the router cavity this weekend. It was too big to have two doors on that side...they just wouldn't clear the crank. So I moved the rod back and mounted it all inside the cabinet. I'll use a nut runner, or a socket in a cordless drill to do the adjusting when I need to. I doubt that it will get adjusted more that the initial time.:wave: Now if I can take a sample of the wood to Woodcraft this weekend to try to match some stain that will work on the birch. Tried Ace on the way home last night, but they only show stains on oak, maple and pine. Doubt that HD will have birch samples either. Hope your week is going well! Thanks for looking in. Jim.
 
Well, I see I need to take a picture of the finished router table!! :eek: I have it finished. I could use one more knob for the dummy door on the bottom right, but that's no big deal.
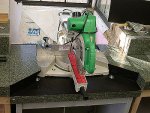
I got the SCMS that was second on my list last weekend at a great price. This weekend I've started the mobile stand that will allow it to dock into the multifunction cabinet. Didn't make a lot of headway. Had a basic plan drawn out, but many of the specifics on how it was going to work were done sitting and thinking as I finished a cut. Now I need to exchange 3 bolts and find some laminate to continue.
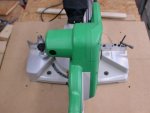
Picture one shows the saw sitting on the top of 3 layers of 3/4" MDF. DSCN1906.jpg Notice the 4 holes to the outside of the saw. The second picture shows the sub base, 2 layers glued and screwed together, with 4 routed slots. DSCN1910.jpg Bolts will go through the holes in the top layer and through the slots. Under that will be some knobs from Peachtree that comes with their heavy duty T-track. This will allow me to adjust the SCMS to keep the fence co-planer with the built in fences on the multifunction tables.
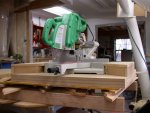
The last picture took me a while to build. Since the SCMS is only about 21" wide, and the slot for it to fit in is 36" wide, I need some filler for the gap, and to give some support for wider boards. This is my solution. DSCN1911.jpg I still need to work on a way to adjust them so that they will be co-planer with the tables on the benches, but I have an idea for that. I just need to figure out how to implement it!
I tried 2 Lowes today looking for black laminate. Neither one had it. There is one more out in Weatherford that I think I remember seeing some at. I might try there after work tomorrow, and trade the bolts out that are too short. If that fails, I'll have to find a day I can take off work for the afternoon, and go get some more of the matching laminate that I've already been using.
Well, the Giants pulled off the upset. The Pats just never got their game on. Have a good week everyone! Jim.
 
Looks like you've been making some steady progress, Jim. I see you used a Herculift on your router table, and I am going to eventually make a "Base" to replace the "portable legs" that are on a "Router Workshop" table that I have, and when I do, I have one of the 4 Herculifts I have stored, set aside for that project. I would like to get the "Lathe Extension Kit" from Rigid for one of the Kits so I can put it on the HF Lathe that my Buddy gave me, but I haven't been able to find out how to order one since they quit stocking them at HD, and they, (HD) didn't seem to have any idea of how, or the desire to help me order one. It's hard to find that size tubing around here, or I would just make them myself, (and may have to anyhow If I can't get a kit).
 
Looks great Jim. Just currious, are you running an internal ground wire on the PVC to discharge static?


Darren, no ground wires, and I've had no problems with static. Every once in a while when I walk past it I can feel the hair on my arm stand up, but I go ahead and touch the pipe and no shock at all. And I've been cutting a lot of MDF the past few months. I don't see this as a problem.

Norman, have you tried emailing Ridgid direct? Or HD at the commercial counter for ordering? (Probably be very expensive) You might try logging on to the Ridgid Forum and ask there.

Thanks guys! Jim.
 
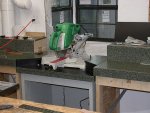
Well, I finally got the SCMS cart to the point of being usable. Not finished, but usable. Still need to devise some type of dust control.collection. I have an idea, but need to get a 6-4-4 wye to make it work. Haven't seen one of them yet. :huh: Hopefully there is an HVAC unit that will work. I used a 8-6-6 metal one for the exhaust on the cyclone, so I hope the 6-4-4 is available.
This is not a show piece. It is a utility cart. I will be painting the rest of the multipurpose bench the same grey as the cart...eventually. ;) There are a bunch of pictures, to show.
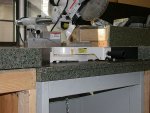
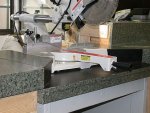
Pictures 1&2 show the base with the sub top attached. This sub top is 2 layers of 3/4" MDF. laminated on top and sides, painted on the bottom.DSCN1921.jpg DSCN1922.jpg Notice the 4 slots for adjustment of the top plate. Picture 3 shows the SCMS sitting on top of the top plate. This plate is 1 layer of 3/4" MDF, laminated on all 6 sides. Notice the 4 holes for bolts that go through the slotes in picture 2 for adjusting. This also shows one wing in place. DSCN1923.jpg Picture 4 shows the underneath side of the top plate and the screws recessed into the plate so the 2 layers of the top will slide on each other and not be gouged by the screws. DSCN1925.jpg Picture 5 shows the left wing. DSCN1926.jpg Picture 6 shows the underneath side of the left wing. DSCN1927.jpg And 7 shows a close up of one of the adjusters. DSCN1928.jpg Picture 8 shows the top with both wings attached. DSCN1929.jpg And # 9 shows the top plate in place on the base and sub plate. DSCN1930.jpg
I'm being called for supper. I'll finish the last 4 pictures in a little while! Jim.
 
Last edited:
Ok, the last 3 pictures are all after it's been levelled out and in place. (The 4th was not a good picture at all.) DSCN1931.jpgDSCN1932.jpgDSCN1933.jpg if my idea works. I'm thinking of cutting 2 4" holes in the top plate, with slightly larger holes in the base top, and hook up the 2 splits of the 6" inlet to those. Would have to have some sort of adaptor, 5" to 4" maybe? Or maybe use a 6-5-5 wye instead of the 6-4-4 I was thinking about? Then how to build a shroud behind it all to funnel the dust toward the holes?
Another idea is to build something on the back of the cart that could overhang the box bay window area if need be, and funnel the dust to a slot at the back and down to be sucked up by the 6" inlet. That idea might just get me past the back of the SCMS and work a little better for adjusting the machine for the compound cuts I might make one day. I think I'll play with the second idea first. That way if it works, I haven't cut two big holes in the top of the cart!! :eek: Thanks for looking in! Jim.
 
Thanks for the thread, Randy. I hope I can build something a little smaller that will still work, but we'll see. I first need to finish off the bottom of the box bay window...right now it is open insulation. I originally thought I'd let that bottom be the funnel for the dust collection, but I'm afraid it would be a big mess with the 3 windows. I wonder why the guy in your thread left the bag on the shroud? My dad has a whole house vacuum system that he's saving for me. I'll probably pipe it to the port on the saw, and let the cyclone catch the rest. We'll have to see how fast the vacuum fills up. May be something that has to be emptied way too often. :eek:
Thanks for the note! Sorry it took me several days to see it. Jim.
 
Well, I gained a new addition for the shop tonight. Now to see how to use it.
We had to replace the air handler in the house (It's 10:10 pm and they are just finishing up charging the unit. :eek:) I saved the blower (220 volt) and along with it came the emergency heating strips (heat pump system). Hmmmmm. Might I have heat next winter?
I'll have to see if I can make this thing safe to work that way. Otherwise I may just use the squirrel cage to blow some air for the summer time. I hope it doesn't blow me away. I've got a 620 sq ft shop. The blower was installed in a 2500+ sq ft house.:headbang::headbang::headbang::headbang:
My installer asked me if I had 220 in the shop. I mentioned I had a 200 amp service to the shop. He thought that would be sufficient.:thumb: :D Jim.
 
Last edited:
Top