Coolmeadow Creations Shop Construction

Wow, I've not updated my own thread in a long time! I'm finishing the 2nd of 3 vacation days today. Took a trip to my parents yesterday to go look at a retirement village they are thinking about going to. And brought back yet another riding mower. This makes #3 from Dad. I'll put the one I have been using on CL and see if I can at least get enough money to get 2 batteries for the other 2. Took about 4 hours to get the "new" one running and the mower deck working properly. Then I burned brush that needed to go away. Then I got about 3 hours in the shop!
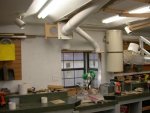
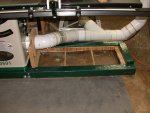
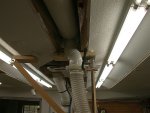
I had cut some 3/4" ply last weekend to make a grid for a deck on the mobile base. Couldn't understand why the saw was having trouble cutting it. :huh: Powered it up with the throat plate off, and no cyclone and I could hear a light rattle until about 1/2 speed, then it went away. Same noise towards the end of the power down cycle. Listened to it twice, then it hit me. I had done the same thing as someone over at SMC (I think)...I had put the blade washer on backward!!! :doh::doh::doh::doh: Don't know how long it would have taken to figure it out if someone hadn't had the privilege of making that mistake before me!! :rolleyes: Cut another strip of the ply, and all is good. So on to the ducting redo at the multipurpose wall. The original setup just wasn't working. So this, I think, will be much better. DSCN2598.jpg The left leg will go to the DC hood for the RAS/SCMS, when I get it designed and built.:wave: And the right leg will go to the planer when it is being used. DSCN2602.jpg I still need to attach a short piece of 4" pipe and a couple 45s so I don't have to have too long of a piece of flex going to the planer hookup.
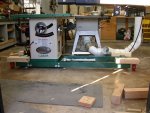
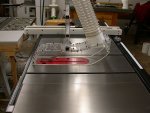
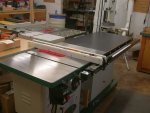
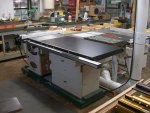
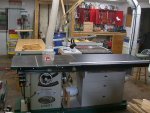
And a couple pictures of the new saw. I still need to drop it about 1/2" and level it out with the other saw and outfeed table. DSCN2579-1.jpg DSCN2597-1.jpg Still trying to decide if I'm going to move the rails to the right or not. I'll leave it this way for a while and see if I have a need to change.
Thanks for looking in! Jim.
 
Looks good Jim, I am please to see your layout a few threads back. Re affirmed what Ed Thomas said to me on a recent visit to my shop. You got he cyclone in the middle and then run ducts down the center and peel them off to the machines. I am thinking i should look to doing the same since listening to Ed:thumb:

I really need to do a shop layout. You done some great work with the pvc duct hooking up the saws there.:thumb:
 
Rob, I didn't have a choice...I had to put it at the gable end to have enough height. The other gable end is in the middle of my swing out door. ;) The main shop ceiling height is 7'8". Where the cyclone is mounted the ceiling height is 7' 6 1/2". (Was originally a carport, and this is the storage area that is raised slightly) I actually wanted to put it in the attached finishing room, but couldn't find a way to make that happen. Ducting would have been a pain since whoever put the roof on the addition and tied it into the other roof didn't take the old roof off first. :huh: If one had the headroom to do this, I'd think in a corner with the pipe running to the opposite corner would work very well also. The main thing I tried to do in designing my ducting was to keep it simple, and no U turns. I also have a pretty simple shop with out a lot of equipment, so that helped keep it simple too. Jim.
 
Rob, I didn't have a choice...I had to put it at the gable end to have enough height. The other gable end is in the middle of my swing out door. ;) The main shop ceiling height is 7'8". Where the cyclone is mounted the ceiling height is 7' 6 1/2". (Was originally a carport, and this is the storage area that is raised slightly) I actually wanted to put it in the attached finishing room, but couldn't find a way to make that happen. Ducting would have been a pain since whoever put the roof on the addition and tied it into the other roof didn't take the old roof off first. :huh: If one had the headroom to do this, I'd think in a corner with the pipe running to the opposite corner would work very well also. The main thing I tried to do in designing my ducting was to keep it simple, and no U turns. I also have a pretty simple shop with out a lot of equipment, so that helped keep it simple too. Jim.

i hope you feed your dogs more regular than you kept up this thread:) just kidding.. glad your on the home stretch jim.. looks like you almost ready to make some new dog house for your friends:)
 
I can't wait to see the finished setup. You have one tough saw there. Read on another forum where this saw fell out of a pickup doing about 40mph.
 
UPS delivers in pickups now???? :rofl::rofl::rofl::rofl::rofl: Oh that would make me sick. I know how my heart sank into my stomach when I saw what looked like fork lift holes in the cardboard around my saw when the driver opened the trailer door. I can't imagine the feeling of losing it off the back of a truck. Why on earth would someone move an expensive tool around with out proper tie downs? I brought a riding mower home from OK in a trailer with sides and gate on it, and I still had 4 ratchet tie downs anchoring the thing. Jim.
 
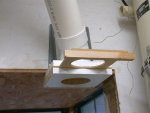
One more part down for the new saw. I started this two weekends ago Got all the pieces cut out the first Sunday (was out of town all day Sat before). Holes drilled and tapped and dry fitted last Saturday. Sunday I took it a part and re-assembled with silicone to seal off the joints. Started the blast gate for it during the week. Finished it this morning and mounted it at the ceiling.
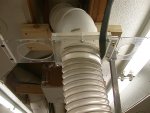
dscn2619.jpgDSCN2620.jpgDSCN2621.jpg Works like a charm! The sandwich parts of the gate, and the sides of the pick up, are 3/8" plexiglass scrap that was here when we bought the house. The slide of the gate, and the top of the pick up is PTEG scraps I got from Ed at Clear Vue. The hook up is a 4 X 3 to 4" round adapter for gutter down spout to 4" S&D PVC. Perfect match. Make the 4" part set wide, and the plexi butts up against it. That sets the width of the pick up where it straddles the throat plate on the saw and rests on the CI top. I ran a piece of the UHMW tape on the bottom edges and it slides up and over wood and my Smart Miter very nicely! I made this one longer to angle the snout so it would go over the Smart Miter. The original one on the other saw hit the miter bar and stopped everything.
So that part is now done. I got the Smart Miter reset for the new saw...miter part lacks about 1/4" reaching the blade properly. I've used all of the adjustment there is...The slot just needs to be a little longer. I'll contact JointTech and see what the answer is. They are really great people to work with.
Time for lunch and watch the Ranger game. Jim.
 
Last edited:
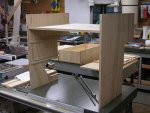
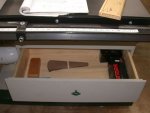
Just remembered, supper called and I didn't get this posted here!! I started this last weekend and made a bad cut where the duct goes through the cabinet (on the lower left). I actually put the unit in backwards, marked it, and cut it without realizing what I had done! :eek::eek::eek: Here it is with the new piece cut out and attached and with the drawer slides mounted. DSCN2641.jpg Looks are not deceiving, it is shallower at the bottom than the top. I was limited by my mobility design as to how deep it could be at the bottom, but I knew I needed the top shelf to be much deeper to hold my Jointech Smart Miter.
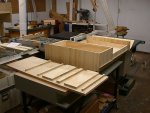
The base section has multiple runners attached to it for the mobility blocks to rest on. DSCN2642.jpg They will store upside down, and the runners allow the bolt heads to not scratch the bottom. After painting and allowing a month or 2 to completely dry, I'll put some slick tape on the runners. The 2 drawers are sitting back to back beyond the bottom section, and the door to hide the mobility blocks is just beyond that.
Now to put a coat of Kilz on it all, then the top coat. I took my motor door with me yesterday and got a quart of paint matched to it. In the store, I thought it was too dark, and probably is just a smidgen. But the test over the white Kilz makes for almost a perfect match.
I'll try to do some painting during the week as I had to knock off about 5:30 to drive over to Grand Prairie (almost to Dallas) to get a headboard for the guest room bed with my wife. Now I need to take time to bolt it to the frame. Probably not tonight!!
Hope everyone had a good weekend! Jim.
 
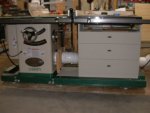
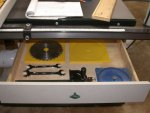
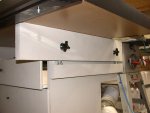
Well, here's an update on the cabinet under the extension table. I finished painting last weekend, and got the cab part installed. Finished the drawers after work this week, then tweaked them to fit properly today. DSCN2644.jpg I need to do some touch ups. And the fit isn't perfect, but it works. I need to get some of the toolbox liner material to put in the drawers. Drawers have 2 coats of water based poly on all surfaces. DSCN2647.jpg DSCN2648.jpg The bottom door just pops into place and is held there by 2 magnetic catches. DSCN2649.jpgWorks better than I thought it would. When my pivot system didn't work for the bottom, I figured I'd need 2 more of the catches, but I think not at this time.
The drawer pulls match the ones on the router table doors/drawers. Only these are painted green to match the green on the base. :rofl: The body color of the cabinet was matched to the motor cover on the saw, but isn't that close. She kept adding to the original mix, and it looked very close wet. But after 2 coats and decent drying, it looks a lot grayer than the saw. But it will do fine. The runners for the casters to slide in on have pieces of PTEG on top of them so that the paint won't get scratched off. Wish I had a big piece for the top shelf for the Smart Miter to sit on. DSCN2646.jpg I'll have to look for something to put up there.
I still need to get some 1/4" for the back, so it's not totally finished yet. I might add some ply to block off the ducting from the casters, as that will be hard to cut the 1/4" ply to fit around. Blocking that off would also give me a small spot to be able to store something. We'll see.
Hope you are having a great weekend! Jim.
 
Last edited:
nice use of the space under your saw extension table jim. and you can still get to the anchoring spots should anything come out of alignment.. i need to readjust mine it now has the bump bump 2when i slide the fence to the saw.. must have been the group of guys that showed up last fall,, they must have caused a small quake:D:D
 
I'm building the replacement extension table starting this weekend. I say starting because I'll have to wait a couple weeks before I can afford the laminate and glue to finish it. Also need a router bit to chamfer one edge like I want. I'll show more of that when I get to that point.
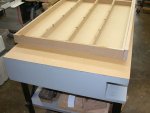
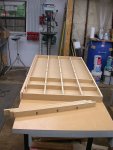
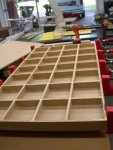
I cut the top and bottom first out of a full sheet of 1/2" MDF. I've always used 3/4" before, but this won't take much pounding so I'm thinking the 1/2" will be fine. Cut my internal bracing, cut the 3 interior ones down to fit. Cut the half lap dados in all of them. Test fitted. dscn2658.jpgdscn2657.jpgFound I failed to cut the 6 cross braces to length. :eek: (I always seem to get ahead of myself.:doh:) Cut some new ones, cut them to length, then re-cut the dados in them. Test fitted, took apart and started gluing. DSCN2660.jpgDSCN2662.jpg
Now I need to get some fresh Bondo, go over the holes and sand everything out. Then I'll be ready for the laminate.
I also thought I'd get an overhead hatch type door built this weekend, but I see now I won't. We're headed out to pick up some retaining wall blocks LOML found on CL (should have her looking for tools for me!!) then I still need to mow and blow the pecan flowers off the roof. I think my day is shot! Jim.
 
Well, things slowed down here for the last 2 weeks. As noted in the previous report, I got the basic extension table together. Then the big 'ole Bradford Pear in the backyard decided to fall apart. Two 35'+ lower limbs broke off on different nights. I spent last weekend cutting them up, and cutting down what ever else I could safely cut. You see, the service line for my shop runs (ran) about 12' to the north of the tree's trunk. All the limbs were above that. I tried to find a way to tie a rope on to the top, then attached to the riding lawn mower, so I could cut and Glenna could pull the limb away from the lines...no way to safely get a line up there. So had to wait until last Monday to get the power company out to drop the line. Cut 4 of the remaining limbs out on Monday night, and the other 2 on Tuesday night. Of course, they both fell into other trees and stuck, making getting them all the way down a little more precarious, and a lot more work.
They are still all over the back yard. I've cut up about 15% of the limbs. This is going to take a while. DSCN2679a.jpg

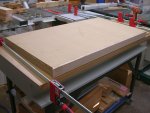
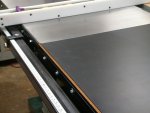
I took yesterday to go get supplies, and install the laminate. Came out pretty good. I used the little Hitachi fixed base router that was a rebate for buying the 10" slider a couple years ago. Worked great. That's a nice little router, especially for free! I test fitted it and got a basic alignment on it. DSCN2683.jpgDSCN2684.jpg I need a chamfer bit to match the angle of the chamfer on the front of the table saw top/wings before it's finished, then seal the exposed oak, and poly the underneath and front edge where it will butt up against the wing. Need to decide if I'm going to drill 2 holes in the edge of the wing to suck the extension table up tight or not. I have decided, now:eek:, that I should have doubled up the MDF on this particular edge to make it a little stouter. Oh well, I'm sure it will work. If worse comes to worse, I'll cut open a spot underneath and slip a fender washer and nut in to secure that edge.
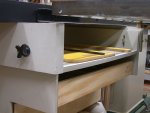
And did I show the routed slots in the top of the cabinet before? Well, this is what they were for: DSCN2685.jpg Very easy to adjust and supports the extension table very nicely. When I make my final adjustments, I'll screw into the sides through the angle iron and rear rail pieces. Yeah, I know, I still need some 1/4" ply to back the cabinet with. One of these days......
Hope this Sunday morning finds everyone rested! If so, come help me with this tree!!! :rofl::rofl: Jim.
 
No Larry, that spinny bug hasn't bit me.....yet.:rofl: It's not something I plan to do. I have enough trouble getting the shop up where I want it, and planning things out for the flat world that I want to do. Maybe once I get the house renovated in 10 years or so, I'll venture over. I think I've offered for anyone in the area that wants some to come on over and get it, maybe in one of the posts about what we're doing for the weekend, or what we got accomplished, both here and at the Creek. Anyone reading this and would like some, let me know. Otherwise it will get burned, and I'm not sure it's very good for that. Jim.
 
The extension top looks real great Jim. I have never done any laminating like that but its now on the to do list when i decide to settle my table saw down to one place.:thumb: The torsion box idea is cool. Should be as good as a cast iron top. Did i see you refering to bondo before you put the laminate down? So you patched the top wood screw recesses with bondo or what?

By the way is contact cement acceptable for this kind of thing? What stops it from being thick in some parts and not others. (the glue i mean)?
 
Rob, yes I used Bondo on all the little holes. I used 18 gauge brads instead of screws on this one. Kind of overkill, but if you've read much of this thread, you'll know it's normal for me. :D I just like to have a good smooth surface for the glue. I haven't had any problems with the glue bunching up in places. I use a 6" long, 1 1/4" diameter short nap finish roller to put the glue on. Pretty easy to get an even consistency with it. I did end up with a piece of wood chip when putting the laminate on my router table. Made a huge bump. I had to drill it, the epoxy a penny in to get rid of it. Guess the pieces of wood I used to hold the 2 pieces apart before sticking it down carried it in there. I use old mini blind louvers now. Easy to wipe down with a wet rag to get all the loose stuff off before using...no splinters! Jim.
 
Last edited:
Ok, the extension table is on, leveled, and locked in. DSCN2712.jpgDSCN2713.jpgDSCN2714.jpg As you can see in the pictures, while I was at it, I went ahead and moved the fence all the way to the right. I went from just over 49" rip to almost a full 65". I still need to make sure all my adjustments are where I think they are. Probably will do the 5 sided cut test to verify. The new Infinity combo blade is on. By the way, this is a great looking blade! Their Nickel-Armor finish almost gives it a full chrome look! Very nice!!! Much more industrial looking that some of the finishes available. Hopefully it will not rust either. My Forrest WWII 30 tooth after less than 8' of 2X material ripped came out rusted last week. I'm still cleaning it up.
I had to add a piece below each of the adjustable "arms" to be able to adjust the table properly. Just a piece of 2X with t-nuts in the top and a bolt. One for each side.DSCN2717.jpg Using this, it is very easy to adjust, then lock the knobs down and it all stays put!
And I beveled the front edge of the extension on the saw instead of buying a router bit. Didn't get it set perfect, so took off a little more than I wanted, so it's not a perfect match to the table saw, but it will be fine. DSCN2716.jpg
I need to replicate 2 arms for a chair my wife "saved" from the road side that she is refinishing. :huh: I got a piece of QSWO since that's what the arms looked like to start with. I'll fire up the planer for the first time. Only 6 years old!!! Then template route those, and drill to match the mountings. I'll get started on that this afternoon.
Need to use the remainder of the wood to build something to hold the ashes from the 2 we lost 2 years ago. I've said I was going to do something special for them, and haven't.
Hope you are all having a great weekend! Jim.
 
Top