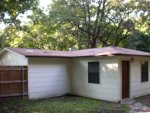
Coolmeadow Creations Shop Construction

Yeah, real close, Steve. I'll probably wait until I get that last piece of t-track before I anchor the tops down, so I can make sure I get everything nice and tight. Need to check out Peachtree on line and see about ordering that last stick. I got the other two 8 footers from them at the local edition of the Woodworkers show almost 2 years ago now. I don't need to wait until December to get the last piece I need. :p Wonder if the have 6' pieces? I need two 25" pieces to finish. Have a good week! Jim.
 
Roofing repair part deaux.

Ok, it's 10:05 Tues am, I've got the ridge vent and shingles off, now I need to pull nails and get the rest of the old roofing felt off, then it will be time to put the new felt on. Might have to resecure some plywood , and I will need to cut some shingles to fill in the valley a little better before I shingle for good. Remember this was a section of roof added on to an existing roof, and they didn't bother to take the old shingles off before they did it, so I have a pretty deep junction where the new plywood drops of to the new roof. No wonder stepping on the valley caused a problem. Makes me wish now I had gone ahead and spent the 35.00 for the valley flashing. Oh well.
My water break is over. Back to the heat. Jim. (Who is already on his second shirt of the day.)
 
The joy of looking at your pics is that the progress seems to go in leaps and bounds. I'm pretty sure it does't feel that way on your end though. That is going to be a great workspace.
 
Those torsion box benches are going to work out very nicely. :thumb:

On the t-track, you may find it's more economical to buy two 4' sections instead of one 6 or 8 footer, to avoid oversize shipping charges.
 
Thanks Glenn.

Yes Vaughn, I looked at that last night. If nothing else, 2 4' sections are 10.00 cheaper than 1 8' section, before the shipping!! But if I do the 1 8' section, I'll have enough left to play with for something else, like mounting a section on top of the new Biese fence in the future.

I'm cleaned up from my day on the roof. But I don't feel human again yet. Man that sun just drains you. The heat itself wasn't that bad, even though it was 96 today. I came inside for 3 hours from 12 to 3. By that time the trees were shading most of the roof again, and it was manageable. I had to go at 5:30 and get another roll of felt. I was about 17 feet short of having enough. So it is safe for the night, although I don't think we have a chance in hades of any rain, even though they said 30% last night. Maybe by Friday. Hopefully I can get the shingles on in the next 2 days. If not.....I do have a tarp. :thumb::D Thanks guys! Jim.
 
Well, I'm not as bushed as I was yesterday, and I worked a couple more hours in the middle of the day. But that black felt is HOT!!! Ended up folding my sweat towel up and sitting on it. :eek: I got all the main courses on the roof. DSCN1667.jpg Now I need to cut, probably go get some more shingles, again, and do the ridge caps. The last thing I will need to do is clean up the vent cap and reinstall. I'll probably save the trash cleanup until Sat. Sat late, or on Sunday, I'll get the ceiling panels back up, then get back to the multifunction benches. I did get the second coat of poly on the short pieces before I came inside. Sure wish I could have saved this roofing until October. That was my original plans, but something got in it's way. More about that next week.
Where's my bottle.....of Gatorade???? :D Jim.
 
Last edited:
IT'S FINISHED!!!! (I hope:rolleyes:)

Just finished the roof. Should have been done by lunch time, but the caulk I used on the ridge vents crystalized on 3 of the 5 sections. Half way through the 4th section, I gave up and just put it back on. May need to replace it if Lowes still has some. It was on clearance last Spring when I did the other side of the roof. If I had known I'd be back up there, I wouldn't have used the caulk. I'll get a picture of the roof on Sat and update. Too tired to crawl back up on the roof tonight, and the pictures from the ground really don't show anything and always seem to be fuzzy.
Well it's back to work tomorrow for 1 day, then off for 3 more.:thumb::thumb: Sure is a weird week. Jim.
 
Boy, you got finished JUST in TIME, Jim, if you get what we have been getting for the last half hour or 45 min. Oh well, you need to test your roofing work for leaks anyhow. I'm in Highland Village at my Daughters' and it's been raining Cats and Dogs. I just BARELY got the new unfinished Mahogany door for their house unloaded and into the garage when the rain hit. Wheeeeeeeew......., I sure didn't want it to get wet. The sun was shining bright when I started to pick it up and most of the way back and then the weather suddenly descended upon us. Looks like it is sure going to mess up my "Finish Schedule Plan" though.
 
Last edited:
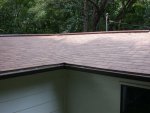
Stu, I liked-ta-died doing it! It was not my plan to do it until October when it cooled down. But I'm giving notice at my current job on Tuesday, and it was either now, or lose the vacation time and wait a year until I get vacation time at the new job. So now it is...er was. :rolleyes: But it's done and the grounds are cleaned up. DSCN1668.jpg Probably should clean out the gutter still. But, that's no fun. LOML can't see up there ayway. :thumb::rofl:
I started planning out the router table this morning and listening to my favorite radio station in the shop. Very relaxing. I've decided to adapt 4 legs I built many years ago at the other house so I could stack a dog crate on top of another crate because space was so tight (15 X 12 master, with King bed, 8' dresser and 3 1/2' chest, and 1 night stand. That's changed in the current house. MB is twice as big!) So I've had these legs in storage. DSCN1671.jpg They are a little short, but I'll extend the top with some Oak veneer plywood, and maybe cut in a shallow drawer on either side of the router chamber for template storage. We'll see. First I'm going to make the frame and get the Herc-U-Lift mounted, with the stretchers top and bottom, then I'll go from there as to how to finish it out. Nothing will be glued together until I get the rest of it built, so it can all be changed. The legs should be sturdy enough...4/4 Oak, glued and screwed into an L shape, with a 2X1 1/2" block 3" long glued and screwed into one end of each. This will get drilled out for the levelling feet and T-nuts. The base will be roughly 32 X 39, and the top when added will be 36 X 48. Yeah, that's big, but I'll be using (have had for 3 years already) the Incra 25" LS Posititoner system. It needs 18 or so inches from the back mounting base to the back of the fence. And I want some space out in front of the PRL lift. Most tables only look to have about 6" from the front of the lift plate. I should have about 14.
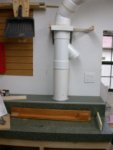
Oh, and yesterday I got the tops attached and the ducting dry fitted through the hole, and the foam isloator installed around the pipe. It shows in the picture above showing the leg.
Time to eat, then back to the shop! Jim.
 
Jim,

A question about your PVC DC piping.

Are you using schedule 40 PVC ? or the lighter weight outdoor sewer pipe which is usually called ASTM D2729. I know this is crazy but the 2729 I am finding uses green pipe and white fittings. I just don't want the green pipe. ( like I said, I know I am crazy, but it's MY shop!!! ).

Also, could you give me some details about your cutoffs for the DC pipe.
 
Last edited:
Actually ATSM 2729 is white. SDR35 (otherwise called ATSM 3034) is the green pipe. Both use the same fittings. 3034 is thicker walled, so the inside diameter is smaller, and the pipe is heavier. 2729 is harder to find, and a little bit cheaper, if you find it at the right place. If you can only find 3034, you can get the plastic spray paint. :D I actually had to paint a lot of my pipe because of the rust stains it had on it. Because like you, I wanted it white.
And by cut offs, are you talking about the blast gates? If so, let me find the tutorial I did at SMC and point you to that thread.
Here it is: http://www.sawmillcreek.org/showthread.php?t=42643&highlight=Blast+gate
Forgive the spelling errors. I can't believe I missed that many. Not surprised that I made that many, just that I didn't catch them in proofing. If blast gates are not what you are talking about, then I need some help.:D Jim.
 
No, no, no Nothing that permanent. :D Most of these slip joints are fairly tight dry. All I have done is push them together, then use some silicone caulk to seal the joints. On vertical runs, you have to have something that supports the pipe so the weight doesn't pull it apart, but that's it. Two of my vertical runs have a connection to the floor. The other one, shown in that picture, is anchored to the wall at the blast gate. Very solid. I used another half section like the blast gate under the bench. The fit is so tight to the pipe, I have to beat the wood with a rubber mallet to get it to slide on the pipe. It is screwed into the bottom of the bench frame as another mounting point. I need to try to move it down another 1/2" to take some of the play out of that 6-6-4 wye. It will slide up and down about 3/8" on the pipes above and below it. I've had to take several of the joints down fitting this wye in, and it really is easy this way. Just score the silicone at the joint and work the joint back and forth to get it apart.
Hope this helps! If you have some other questions, don't hesitate to ask. I don't know everything, but glad to help with what I've learned. If interested, the rest of my cyclone ductwork installation can be seen starting at post 60 (last on this particular page) at SMC. http://www.sawmillcreek.org/showthread.php?t=14427&page=2&highlight=coolmeadow
Jim.

I just re-read your question. I didn't answer it at all! :doh::doh: Actually I went to the joints, not the connection to the blast gate.
I made my own circle cutting jig for the router. I played with the pivot point until I had a hole that was a tight fit to the pipe. I had to actually beat the pipe into the hole, then used silicone on the outside of the joint. The hole for the exhaust wasn't as tight a fit, becuase it was a metal wye instead of PVC, so I drilled some pilot holes through the wye into the wood material, in this case, the wood was the same, but there is no blast gate to close off the air flow, and screwed some flat head screws into the wood to secure it, with lots of silicone on all parts where the pipe touches the wood. You could do the same with the PVC. Just counter sink the screw heads a little into the plastic. Use a coarse thread screw, and I bet it would be fine. Silicone over it and smooth it out with your finger.
 
Last edited:
Jim,

Thanks. I am beginning to understand how big a job it is to get a DC installed.

Lots of planning, but I enjoy that as much as anything else.

As for this weekend, I am painting concrete block walls. A LOT of work but since I intend to spend a lot of time in my shop, I want to be happy in the surroundings.

I will start a thread when I start doing the pipe work, so I will have a place to ask all of the questions I need to ask.

...bartee...
 
Yes, I saw your post on painting the walls. Having walls that are white makes such a big difference!! I thought my shop looked bigger once I got the walls painted, well, actually 2 coats of Kilz primer, white. But I seem to clutter it up with scrap pieces of wood and boxes to take up that "extra" space. :D I'll look forward to your thread. Jim.
 
Well, I only got about 3 hours in the shop today, with work and time out for a haircut. I did get the MDF after work, and got it cut for the top. I finally decided on 53 X 36 for the top after looking at the Woodpecker site and their full system for the 25" LS positioner is 53 X 32.
I got the "thru" holes routed out on both top and bottom pieces. Tomorrow I will laminate the top, then router out the opening for the PRL to fit. I test cut a piece of scrap MDF for the depth of the cut and then came inside and got the PRL out to check. I'm off a little, but man is that thing massive!! It has been a couple years since I had opened the box to look at it. It and the gold anodized Incra fence are sure going to look pretty on that mostly green Formica I got for the top! And that's not just because I graduated from Baylor, and BU's colors are green and gold!! :rolleyes:
Oh, and I had been checking on the HD that I got the laminate from, to make sure I could get 1 more sheet before they ran out. I missed. A week or so ago, they had 15 or so sheets. Yesterday they were out. I went to another HD for the MDF today, and he told me who the distributor was here locally. It costs 20 bucks for them to deliver it across town. I'd say the worker thinks that is crazy, so without telling me to go get it there to save the fee, he told me how to do it. :clap::clap: Nice guy! Trick is they aren't open on Saturdays, and with me starting a new job in 10 days, I've got to decide how quick I'm going to need it. Had planned to use it on a future outfeed table, but may just go with MDF and either BLO finish, or some Poly on top, either of which should be fine for it.
Well, got to get my sleep so I don't mess up a 21.00 sheet of MDF in the morning.:D I'll post some pictures tomorrow night. Jim.
 
Top