Building a Bench on the Back of the SawStop *Almost Done*

We had a good day today, I found out that there is a Viva Home center (not Super Viva Home) fairly close to my house, only 12Km away, took less than 30 minutes from my parking to the parking at the store, that is a LOT closer than the Super Viva Home I usually go to. It is a smaller store, thus they have less stuff, but they still have a LOT more stuff than anything that close. :thumb:

I got the new angle iron, and did some work on the Back Bench after we got my SIL moved into her new Aparto. :clap:
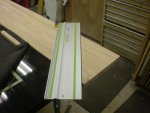
SN3D0298.JPG
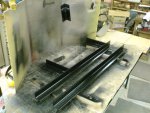
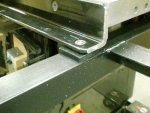
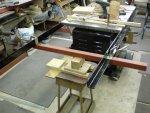
I took the front tube and the extension table off to work on the support brackets, here you can see the angle iron in place.
SN3D0299.JPG SN3D0300.JPG
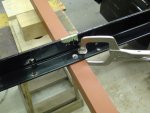
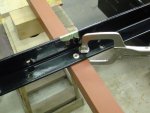
I drilled and counter sunk a hole for the bolt to go into, worked slick!
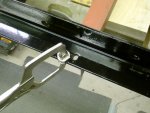
SN3D0301.JPG
On the front rail, I made an oblong hole, just like the rails has in it, so the fence tube can be adjusted front to back. The fence tube bolt will hold this end in place.
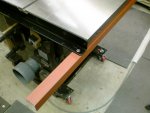
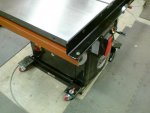
SN3D0302.JPG SN3D0303.JPG
On the left side of the saw, I drilled and counter sunk holes for the bolts, again, it worked well.
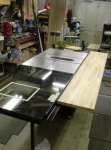
SN3D0305.JPG
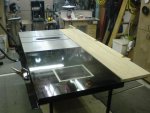
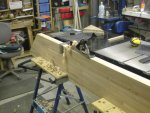
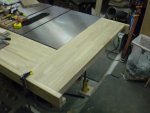
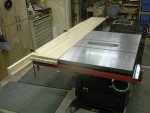
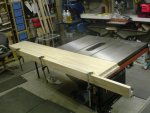
I put the two slabs in place (they are NOT yet laminated together) to see how things line up, fairly good I'd say!
SN3D0306.JPG SN3D0307.JPG
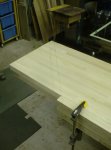
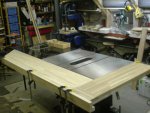
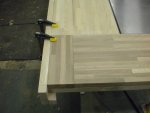
I then put the apron in place, held with clamps. The apron is just long enough for what I want to do, the over hang on the apron will be filled in with another double slab. I purposely left a step in the two slabs, to make the joint between the slabs coming at 90 degrees stronger...............

Cont.......
 
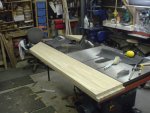
SN3D0309.JPG
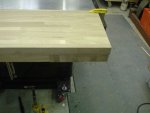
A shot from the other side.

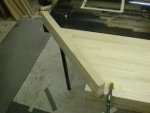
SN3D0308.JPG
in this pic, you can see (I hope) the line drawn at a 45, this will be the cut line, and there will be an apron on that side as well.

I have a question, how would you do this corner?

I'm fairly sure I'm going to give some hand cut dovetails a go for the other corner, but I'm not sure about this one, is it possible, or even a good idea to do a dovetail on a 45 corner?

More tomorrow! :wave:
 
View attachment 30918
A shot from the other side.

View attachment 30917
in this pic, you can see (I hope) the line drawn at a 45, this will be the cut line, and there will be an apron on that side as well.

I have a question, how would you do this corner?

I'm fairly sure I'm going to give some hand cut dovetails a go for the other corner, but I'm not sure about this one, is it possible, or even a good idea to do a dovetail on a 45 corner?

More tomorrow! :wave:

I don't see why you couldn't do a hand cut dovetail on the 45 :thumb:. I would think that your apron needs to be longer to extend to the outside layout line to make it work though. I can envision what you want to do but I'm not to good putting it into words:huh:.

Are you still putting an extension on the side and if you are I was wondering why you didn't weld a piece of angle on yet:dunno:.

PS, If I knew how to take the second picture and draw on it to show what I mean I would but haven't learned things like that yet.
 
Last edited:
Yes Alan, I'm putting the extension on the left side of the saw, and I've not welded the supporting angle irons on yet, as I've not determined the exact width of the extension.

I did get some more done today......

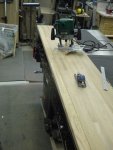
SN3D0310.jpg
I had to route a slight relief on the one edge, as the slab is 60mm thick, and the height off the back angle iron on the saw is about 58mm.

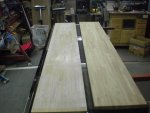
SN3D0311.jpg
Here the slabs are ready to glue together....

SN3D0312.jpg
....and the clamp rack has been depleted :thumb:

I'll be able to get the slab cut, and figure out the rest of the dimensions so I can move this along.

Cheers!
 
So Stu, what about the dovetails on the end that is getting cut at a 45 degree angle:dunno:? I think I need to invest in some more clamps. Ran into the same problem you just did, Thankfully I remembered I had a vacum bag and glued up the 8" x 8" x 45" blanks for the columns I turned. Don't know how I ever got along without one:dunno::huh:.

With all this remodeling and organizing going on in this forum, you all got me really taking a hard look at some of the items I'm not satisfied with I my shop.
 
Looking real good Stu. I like the way you are doing this and it has certainly helped me in my thoughts for my outfeed table. Thanks for posting and all the pics.:thumb:

Hey, I live to post pics :D :thumb:

Honestly, I get so many good ideas from various people on the web, that I just try to pay them all back by posting what I'm doing, and hoping it helps out some one else :wave:
 
So Stu, what about the dovetails on the end that is getting cut at a 45 degree angle:dunno:? I think I need to invest in some more clamps. Ran into the same problem you just did, Thankfully I remembered I had a vacum bag and glued up the 8" x 8" x 45" blanks for the columns I turned. Don't know how I ever got along without one:dunno::huh:.

With all this remodeling and organizing going on in this forum, you all got me really taking a hard look at some of the items I'm not satisfied with I my shop.

Alan, I honestly don't know, no one chimed in telling me it was a bad idea, so I'm going to give it a go, I'll do some practice pieces first, but what the heck, see what happens, maybe I'll learn something :eek:

A vacuum bag is something that I'd like to invest in, when the right project comes along, I've got a very good vacuum pump, so I'd just need the bag.

I have a lot of clamps, I imported about 500 18"a clamps to sell on Yahoo auction here, I still have a few boxes left, so I'm not running out anytime soon, but yeah, you can never have enough it seems :thumb:
 
Back to the job at hand :thumb:

I unclamped the main slab, and then I cut the 45 on the one end.....

cutting_45.jpg
The Festool TS55 did not cut all the way through, I had to flip it over, but still, this sure is the way to cut this kind of thing, love that Festool saw!

cleaning_up_edges.jpg
After I cut the 45 on the one end, I put the slab into my two workmate clones (I'd forgotten that I still had them) and I dug out my old Bailey #5 plane, it made quick work of cleaning up the edges of the slab :thumb: heck it was fun too! :D While the #5 is a "Jack" plane, not really a jointer, for this job, I think it did just fine.

main_slab_ready.jpg
OK there is the main slab ready to be attached to the saw, on the edge that butts up against the saw, the bottom edge is rounded over, as the inside of the angle is not a perfect 90 bend, I needed some clearance, and also the top edge is rounded just a touch, as there is a minor gap over the angle iron. I just thought it was better to have a slightly rounded over edge, rather than a sharp 90 edge.

45_edge_apron.jpg
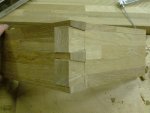
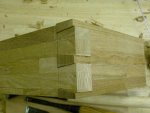
Here is he piece that is going to make the apron edge on the 45 cut part of the bench, you will note that both apron piece extend beyond each other, so I should be able to make a dovetail joint in the corner.

Now here is a question for you, which style of dovetail should I cut?

Sure a nice thick dovetail look cool, like this example on a Frank Klausz bench......
frank_klausz_corner.jpg
..... but I think that looks better with pieces of wood that are square in cross section, mine are more rectangular, like a drawer side.
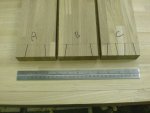
which_dovetail_style.jpg
I'm thinking that "C" would be best, but what do you guys think?

I next cut up the remaining slab for the left side bench....... and I had a brain fart and really screwed up :doh:

I could not get two pieces wide enough and long enough from the one slab, the pieces I need are 111 cm long by 28 cm wide. The slab of wood is 210 cm long and 50 cm wide. What I did was cut two pieces that are almost long enough, and I thought I'd just put another piece in to fill the space.....

left_side_bench1.jpg left_side_bench2.jpg
Some of you might say it looks OK, but, I hate it, and it would ALWAYS remind me of the bonehead mistake I made, and honestly, I don't need any MORE reminders :rolleyes:

left_side_bench_mistake1.jpg left_side_bench_mistake2.jpg
Yep, looks like a dog's breakfast to me, I just hate it :(

What I should have done, hindsight being 20/20, is I should have cut one piece long enough for the top, and then used two pieces on the bottom, out of site, but I'm not that smart...... :eek:

Oh well, I've got to go out to Super Viva Home and get some parts I ordered that finally came in, so I'll just buy another slab and do it right, the second time :rolleyes: :wave:
 
C looks best.

(I would probably consider just mitering it and putting in some dowels, or maybe miter it and cut some dovetail keys)

And yeah, dog's breakfast... unless you had some contrasting wood to put in there to make it look like it was done on purpose.
 
Maybe I'm not really visualizing this correctly, but with those apron pieces making a 135* angle instead of a 90* corner, the pin ends are going to be distorted from the normal dovetail shape, so I think I would have to agree with Art and just mitre the apron pieces and then cut the grooves and drive in dovetail splines across the corner like you see on some boxes and cases. :dunno:
 
Maybe I'm not really visualizing this correctly, but with those apron pieces making a 135* angle instead of a 90* corner, the pin ends are going to be distorted from the normal dovetail shape, so I think I would have to agree with Art and just miter the apron pieces and then cut the grooves and drive in dovetail splines across the corner like you see on some boxes and cases. :dunno:

I might even just cut the miters and then use some dowels to pin it. :dunno:

I went and got the new slab and cut it to fit.....
new_slab.jpg
MUCH better :D :thumb:

On to the Dovetails.......

making_dovetails.jpg
Here are the first ones I made, not bad, need some more practice.

That funky swallow tailed chisel that I bought a while back sure worked well on these larger dovetails, made it very easy to clean things up.

practice_dovetails_1.jpg practice_dovetails_2.jpg
A couple more pics.

Yep, I need some more practice. :eek:

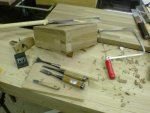
BTW, I just wanted to show you the saws I use......

stus_saws.JPG
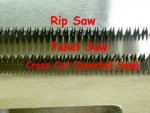
I use the top three saws the most, the middle one is the "Panel Saw", is a strong back saw, but it is designed to do both cross cut and ripping, and it actually made for cutting plywood, which it does very well, I'd say it is the closest thing to a "General Purpose" saw I have.
The top saw is a ripping saw, it does very well at ripping.
The third saw, the Crosscut saw is the one I use for my dovetail cutting, it works well, and has a very fine cut.
The next one up is a flush cut saw, this saw has no "set" to it, and is great for cutting off dowels etc, but I DO hate the cheap pink plastic handle on the darn thing :doh:

Last is a center starting saw, this saw is used for making a plunge cut in the middle of a panel, most of these are two sided, but I found this little one sided saw to work very well.

saw_teeth.JPG
This pit is to give you an idea of the differences in the teeth profile.

Cheers!
 
Stu correct me if I'm wrong but are those all japanese saws and if so all the ones I have ever seen never had a back on them to stiffen them:dunno:. something about when they cut the wood it is supposed to be on the pull stroke:huh:.
 
Yes Alan, all Japanese saws, yes all pull stroke.

The backed ones are very, very thin blades, only 0.6mm so even though they are a pull saw, they need the stiff back.

Cheers!
 
Today, unclamped the small slab that I glued up last night, then I cut it to length, as I'd left it touch long, and fit it, it fits just fine:thumb:

Next up, I made some spacers for the angle iron supports, I don't know if I mentioned this or not, but the support angle iron was not on the level, seems the angle iron pieces that are part of the saw's fence, are not the same size, the one on the back is 5 cm tall, the one on the front is 6 cm tall, so the angle iron supports were not level, they were angled up at the back.......if that makes sense :rolleyes:

To solve this, I made some spacers to go between the back fence angle iron and the new angle iron supports, worked well.

Next up on the list was to weld the arms on the angle iron on the left side of the saw, that will support the small slab, I did that, and I even painted all the pieces....

barckets_painted.jpg
A few coats of rattle can black, and they pieces will fit right in.

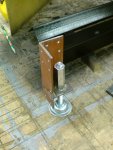
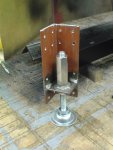
While I was welding and cutting metal, I made up one of the three leg levelers I'll need for the back bench.

leg_leveler1.jpg leg_leveler2.jpg
It will look better when I paint it.

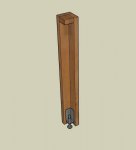
Good and solid for sure. The legs will be made from two pieces of the left over slab, not a solid square piece, as I want to put shelves under the back bench and having a leg that is NOT square will make that easier to do.

Lots of holes for screws in the leg leveler, dunno if I'll put that many screws in it, but it is good to have options:thumb:

Cheers!
 
So Stu will the legs hang in the air when the Sawstop lift raises the TS? I guess so right?

Are the legs going to be a single piece of the slab or you going to double it up or do a 90* with two pices but jointed together on their sides. Boy wish I was good with Sketchup i would sketch what i mean?

WIP looks good. I have to compliment you. You put a great deal of fun back into my workshop world by reminding me that i can make much of my own tools etc. Somehow we get waylaid thinking we need to buy that perfectly machined or moulded widget or tool when with most of us the workshop we have we could easily turn out a more than appropriate version for a hobbyist use and at the same time get the satisfaction of the build.

Keep it up, I really enjoy your posts. I really want to get a welder one of these days. Will wait for the NN to move. I think I have about a year to go. Meanwhile I have a buddy that will do it for me.
 
Good progress Stu.:thumb: I guess I'm going to have to holler "Calf Rope" and give up on trying to find that extension plan & article.:eek: (I DO know that I didn't Dream it):rolleyes:

I think that you could figure one out though with the "Tiny Bit" of Info that I remember about it, so here goes. Basically the guy made three "U" channels from wood, that were sized so a 1" pipe was a slip fit inside the "U" channel in both the horizontal and vertical dimensions. He mounted one under the "Outfeed Table" and back under the saw's extension wings (like where you are mounting your angle) at Each end of the saw and one close to the end of the right side extension table. Then he attached a wood cap to the end of each of the three pipes that would slide in and out of the "U" channels. That Cap would be tall enough to fasten to the pipes AND have the top edge level with the back edge of your "Outfeed Table". You could probably make all the parts out of metal except the wood cap if you wanted to. Heck, you might even be able to just use three good quality full extension drawer slides mounted under there with the wood cap fastened to the ends,.....:dunno:

Hope this helps.

PS: Where did you find those "cup type" washers you used on the bottom of your levelers? When I made the levelers for my shop made mobile base for my PM 66, I couldn't find anything like those, so......... I used some carriage bolts that had the rounded heads, and then got some rubber crutch tips and placed a snug fitting washer into the bottom of the rubber tip and then inserted the bolt head and put another tight fitting washer over the bolt and forced into the rubber tip, down close but not touching the head of the bolt. This arrangement keeps the bolt head centered in the tip and spreads the weight over the full base of the tip and when the bolt is turned the round head stays centered over the hole in the bottom washer and since it only contacts the washer it doesn't damage the rubber tip. The top washer also keeps the rubber tip loosely connected to the bolt so it raises when the leveler is raised and doesn't fall off.

Just thought I'd post this method in case it might be helpful to someone else that might need to make their own. Oh yes, I tack welded a nut to the top of the bolt after I installed it in the leveler wing, so I could use a ratchet wrench with a long extension to make adjustments without having to get up and down several times to look at the level while making adjustments to level the saw.:D (not really lazy, just don't get up and down that easy any more).:rofl::rofl::rofl::rofl::rofl:
 
Last edited:
So Stu will the legs hang in the air when the Sawstop lift raises the TS? I guess so right?
You sir are correct :thumb:

Rob Keeble said:
Are the legs going to be a single piece of the slab or you going to double it up or do a 90* with two pices but jointed together on their sides. Boy wish I was good with Sketchup i would sketch what i mean?

Yep, two pieces, cut offs from the slabs.

Like this.....

SU_leg.jpg
If that makes sense.


Rob Keeble said:
WIP looks good. I have to compliment you. You put a great deal of fun back into my workshop world by reminding me that i can make much of my own tools etc. Somehow we get waylaid thinking we need to buy that perfectly machined or moulded widget or tool when with most of us the workshop we have we could easily turn out a more than appropriate version for a hobbyist use and at the same time get the satisfaction of the build.

Keep it up, I really enjoy your posts. I really want to get a welder one of these days. Will wait for the NN to move. I think I have about a year to go. Meanwhile I have a buddy that will do it for me.
Thanks Rob, I'm glad that you are enjoying it, I am too, but I'm really going to be happy when it is done, and I can start using the saw.

Good progress Stu.:thumb: I guess I'm going to have to holler "Calf Rope" and give up on trying to find that extension plan & article.:eek: (I DO know that I didn't Dream it):rolleyes:

I think that you could figure one out though with the "Tiny Bit" of Info that I remember about it, so here goes. Basically the guy made three "U" channels from wood, that were sized so a 1" pipe was a slip fit inside the "U" channel in both the horizontal and vertical dimensions. He mounted one under the "Outfeed Table" and back under the saw's extension wings (like where you are mounting your angle) at Each end of the saw and one close to the end of the right side extension table. Then he attached a wood cap to the end of each of the three pipes that would slide in and out of the "U" channels. That Cap would be tall enough to fasten to the pipes AND have the top edge level with the back edge of your "Outfeed Table". You could probably make all the parts out of metal except the wood cap if you wanted to. Heck, you might even be able to just use three good quality full extension drawer slides mounted under there with the wood cap fastened to the ends,.....:dunno:

Hope this helps.
I think I get the idea, thanks Norman.
I am not sure yet if I'll need the extra outfeed or not, I do have two roller stands, and they have served me well so far.

Norman Hitt said:
PS: Where did you find those "cup type" washers you used on the bottom of your levelers? When I made the levelers for my shop made mobile base for my PM 66, I couldn't find anything like those, so......... I used some carriage bolts that had the rounded heads, and then got some rubber crutch tips and placed a snug fitting washer into the bottom of the rubber tip and then inserted the bolt head and put another tight fitting washer over the bolt and forced into the rubber tip, down close but not touching the head of the bolt. This arrangement keeps the bolt head centered in the tip and spreads the weight over the full base of the tip and when the bolt is turned the round head stays centered over the hole in the bottom washer and since it only contacts the washer it doesn't damage the rubber tip. The top washer also keeps the rubber tip loosely connected to the bolt so it raises when the leveler is raised and doesn't fall off.

Just thought I'd post this method in case it might be helpful to someone else that might need to make their own. Oh yes, I tack welded a nut to the top of the bolt after I installed it in the leveler wing, so I could use a ratchet wrench with a long extension to make adjustments without having to get up and down several times to look at the level while making adjustments to level the saw.:D (not really lazy, just don't get up and down that easy any more).:rofl::rofl::rofl::rofl::rofl:

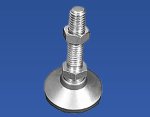
Those are a store bought item, they come with the cups attached, the cups are loose, so they are self leveling.
Like these......
heavydutylevelingfoot.jpg 01s0501s1.jpg

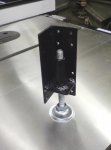
black_leg_leveler.jpg
Here is the leg leveler all painted, looks much better :thumb:

I did get the brackets back on the saw.........

brackets_done_1.jpg brackets_done_2.jpg
I think it looks good in black :D

brackets_done_3.jpg
I also got the fence back on the saw.

spacer.jpg
Here is the spacer I had to put between the bracket and the back angle on the saw, to make the bracket level.

I hope to get a lot more done tomorrow, but I've come down with a cold, so I'm trying to get as much sleep as I can.

Cheers!
 
Last edited:
Top