Dungeon Overhaul..........In Progress....

Just a quicky update.........

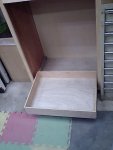
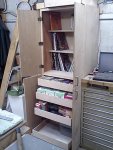
I got all the parts cut for five of these, here is the first one installed...........
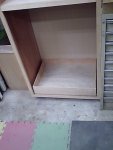
pullout_shelf_closed.JPG pullout_shelf_out.JPG

I think these are going to be a really nice thing to have, it lets me keep my cabinets a bit deeper than they should be, without these pull outs. With the pullouts I will always be able to get at the full contents of the shelf.

Cheers!
 
Nice looking drawer Stu. Is that the full length of the drawer slide? If you get the full extension slides then you will not have any problem getting things from the back of the drawer when all the other drawers are installed. I don't know how expensive they are there but they are worth it in my opinion. As there is no bending down to look for anything.
 
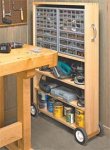
Stu, I just got one of my many "shop tip" emails I subscribe to and saw this storage idea...just thought I'd show it in case it might help you. I like the drawer slide shelves. :thumb:
 

Attachments

  • 20080117sn.jpeg
    20080117sn.jpeg
    14 KB · Views: 52
Thanks guys.

I got waylaid by a wine customer today, no Dungeon time, but the guy did by $1500 worth of wine, so at least the wife is happy :rolleyes: :rofl::rofl:

The full extension slides are here, but hard to find, they cost about $5 more a pair, and I will use them, but the very bottom shelf is going to have the largest over head gap, so I figured I could get away with the 90% slide (they are 45 cm (18") long and only the last 5 cm (2") does not come out, I figured that would be good enough?

The wheels from the lawnmower on the small cabinet, that is a first! :thumb:
 
I got the pullouts done, they are slick!

I was going to use full extension slides for the top two pullouts, but I found out that my full extension slides are about 2mm thicker than the 90% slides, and I'd already made the darn pullouts, so I just went with the 90% slides :doh: Oh well, I still think these are slick! :thumb:
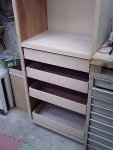
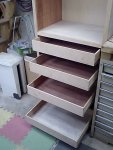
pullouts_done.JPG
Here the pullouts are all installed

pullouts_done_open.JPG
Here they are pulled out, just for the picture

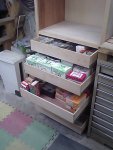
pullouts_done_full.JPG
I've not filled them but almost, all of my various boxes of screws fit and then some, I'm happy with this for sure! :D

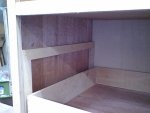
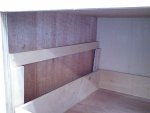
Now, I wanted to add this to the mix, I came up with a very simple way to install the slides in the cabinet, I needed to add a strip on each side for drawer slide to attach to, bringing the slides out even with the inside edge of my face frames (I know, plywood face frames :eek: ).

To space the strips, I cut support sticks.............

spacer_sticks.JPG
You can see the sticks supporting the strip, I've glued and stapled the strips onto the cabinet.

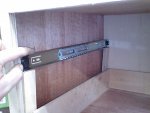
Next, how to attach the cabinet side part of the slides to the strips, well, I did this..........

spacer_sticks_tilted.JPG
.....I just tilted the support sticks out a bit...........

spacer_sticks_supporting_slide.JPG
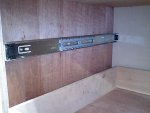
and this supported the slide part so I could drill holes and then screw the slide to the strip, I then just remove the support sticks.........

spacer_sticks_slide_installed.JPG
and everything is good!

worked slick as can be :wave:

I am sure that someone has a better way of doing this, or a jig, but for this application, it worked well, and all I had to do was cut down the support sticks for the next size I wanted for the pullout spacing.

Cheers!
 
Stu,

I probably have some "store bought" jig to do the spacing (not to smart when spending money on tools, so my wife says), however, I am liking your solution much better. If you are going to use the same spacing in another cabinet, don't cut the spacing sticks, just notch them. That dungeon is looking awfully professional like, some it may be considered the "studio of the orient".
 
Hey Stu The drawers look great. Too bad about the full extension slides , I did the same thing with my first set of drawers, that was why I mentioned it. Careful about pulling all the drawers out at the same time. I did that once and learned my leason the hard way. The entire cabinet fell on me. :eek: Ok stop laughing I was having an off day. :rofl: I would suggestt maybe attatching it to the wall to make it more earthquake proof. :thumb:
 
Hey Stu The drawers look great. Too bad about the full extension slides , I did the same thing with my first set of drawers, that was why I mentioned it. Careful about pulling all the drawers out at the same time. I did that once and learned my leason the hard way. The entire cabinet fell on me. :eek: Ok stop laughing I was having an off day. :rofl: I would suggestt maybe attatching it to the wall to make it more earthquake proof. :thumb:

Drew, if you forget again,:D you can add that little "Old Time" gimmic while it is empty, that will only let one drawer be pulled out at a time. It is simple to do, using eyehooks and a heavy nylon cord and a weight. This method has been used a lot on children's furniture so they don't turn them over. When installed, if you try to pull out a drawer when another drawer is open, it will take up the slack and either stop you from pulling it out any further, (if the open drawer is heavy), or it will pull the open drawer closed (if it is light) as you pull out the second drawer. It's a neat little trick to rig up.
 
I see your making progress, good for you Stu...

I'm trying to get my wood cleaned up out of my shop/office so I can get the new bench in there. since I have the emmert mounted already, I can work on the twin-screw for the face. But in order to get the bench into the new shop area, I need to move about 1000 bf of hard maple...and I need to clear out space in the garage for that to happen, some is going in rafters, some is going on shelves, and wherever I can stack it. :huh:
 
Last edited:
Norman, that is a great tip, I'll keep that in mind! I have screwed this one to the wall, so no worries about it falling over! :thumb:

Alan, I do envy your space to move your 1000 bf of hard maple, and I'd sure like to have 1000 bf of hard maple, but I certainly do NOT envy you moving it around!

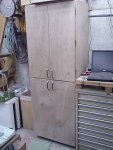
I got the cabinet just about all done.

east_wall_cab_doors_done.JPG east_wall_cab_done_open.JPG

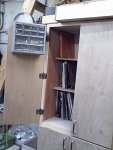
I made the shelves only two thirds of the depth of the cabinet, as I was going to add some pockets on the inside of the doors, like a pantry. When I was moving stuff from the Dungeon secret door shelf over, I noticed that the 4 screw organizer things might just fit on the inside the doors........

east_wall_cab_door_mount1.JPG

yep, that fits..........

east_wall_cab_door_mount2.JPG

just fits.......

east_wall_cab_door_mount3.JPG
...and when closed, the are about 1/2" off the front of the shelves! :thumb:

I just have to mount the last three of these screw organizers and then a small pocket on the bottom portion of each door back, and this cab will be done :wave:

next up the lathe will go mobile, my wheels came, so I want to get that done, which will involve a lot of moving stuff around, as I have to [SIZE=-1]exhumed :rolleyes: :D then all the weight taken off the stand, including the actual lathe. I'll then flip the lathe over, and weld some plates on the bottoms of the legs. The plates will have a hole in them, with a 12mm nut welded to the topside, this will let me bolt the wheels directly onto the bottom of the lathe legs, a bit of work, but it is the right way to do it.

Wish me luck! :wave:
[/SIZE]
 
Really coming along nicely, Stu. The cabs and drawers all look great. It is going to have such a totally new look, you will have to make a new "Dungeon Tour" video!!:thumb:

Are you going to be ready for the gang coming?
 
Really coming along nicely, Stu. The cabs and drawers all look great. It is going to have such a totally new look, you will have to make a new "Dungeon Tour" video!!:thumb:

Are you going to be ready for the gang coming?

Yep, new tour, with the new video camera as well.

I should be ready............ just......... I'm not going to get it ALL done, but when do we ever FINISH our workshops :)

Cheers!
 
I have the JVC/Victor Everio GZ-MG755 but that is not for sale in the US, but the GZ-MG555 is, and the only difference is the size of the Hard Disk Drive, the 755 is bigger....

36.JPG

Sounds like we might have the same camera?

I really like it.

Cheers!
 
Stu,

It's very similar. Mine is an Everio GZ-MG155, and it has a 30gig hard drive. There was another one that had a 20gig hard drive (I think it was a MG125), and this had a larger drive...but the newer models appear to have 30gig and 60gig now, but are a little more pricey. My only complaint is that the light seems sensitive, and the first video I did (2 hours) was slightly dark, it was taken inside a room with fluorescents. I'll take a video of my bench soon maybe, first I need to get some more work done on it, I'm down to the last vise. and boring holes for the bench dogs. There's a guy a found from JVC on one of the online Mac forums, and he's been helpful, but I was disappointed to find out that I won't be able to use the camera portion, I do that for some stuff I do with work and I foresee more of it in the future.
 
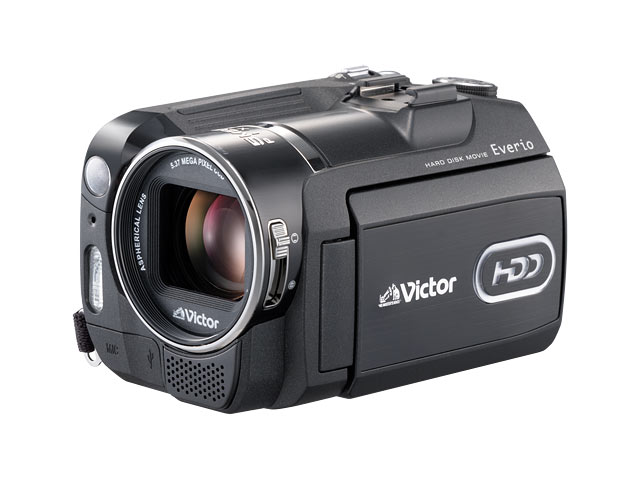
I made a mistake, the camera I have is a Everio GZ-MG575..............

gz-mg575-b_l.jpg

I think the only real difference is mine has the 40 Gb HDD. At the time, the difference in price was not much at all between the two, so we went with the bigger one.

I've found it takes VERY good video indoors, all of the turning vids I have up on YouTube, well most of them, are done on this camera. Make sure of the settings, they are good on auto, but in manual you can play a bit and get even better video.

Cheers! :wave:
 
The cabinet looks great, Stu. I like the screw organizers on the door. Don't ya love it when things just happen to fit? :D

I think you're gonna love the Carrymaster wheels. Which model did you order?
 
Top