Dungeon Overhaul..........In Progress....

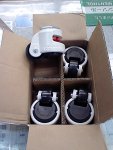
I got the AC-300S casters..........

ac-300s_boxed.JPG
They look well made, solid.

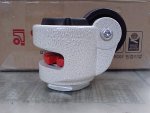
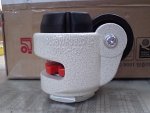
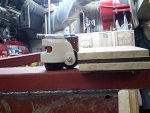
Here are the pics of the caster with the stopper or foot in both the up and the down position (taking into account that the casters are actually upside down....... :rolleyes: )

ac-300s_stopper_up.JPG ac-300s_stopper_down.JPG
Should work well.

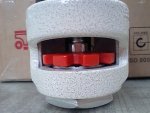
ac-300s_star_wheel.JPG
Here is the star wheel, that you turn by hand to bring the stopper, or foot down to lift the wheel off the ground. You will also notice that there is a spot for a wrench as well, I guess if your load is really heavy, the wrench on there would do if you can't lift it by finger power? :dunno:

Depending on how things go tomorrow, (I have to work on a freaking Sunday! :doh:) I'll get the welding done and put these on the lathe.

I got these from www.zambus.com
Cheers!
 
I did not get down to the Dungeon until 4 PM, up at 8 AM, but I had other "Stuff" to do, including getting new cell phones for one of my daughters and my wife (the cells phones, all four of them, are all in MY name, so I got to be there). The clothes shopping with my wife and two daughters.............YIKES........ a trip to the dentist is more fun! :doh:We did hit a good Italian place for a late lunch, and I even had a beer! :D :thumb:

Then back home, and then a deliver to do, then down to the Dungeon.

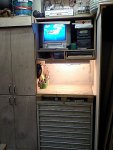
dungeon_entertainment_center.JPG
I built this shelf like thing between the recent cabinet and the sheetgoods storage. I have my TV, DVD player, VCR, and computer (which is my LARGE iPod). Good to get these all up out of the way, and in one spot.


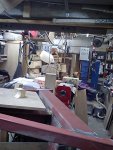
I then exhumed my lathe, and took everything out of that corner.............
more_mess.JPG
..........boy what a mess..........AGAIN........ :doh:


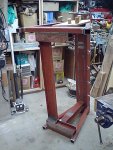
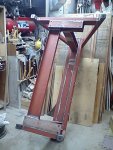
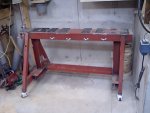
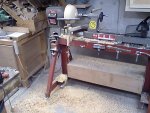
lathe_stand_to_become_mobile.JPG
I took everything off the lathe stand, and got the stand stood up on end, ready for welding ,I hope the lathe will be mobile by lunch time tomorrow:thumb:

One small concern is that the new casters will put the lathe an 1 1/2" taller than it was..........

new_casters_old_pads_comparo.JPG
..... I guess if it really bugs me, I and just make a wooden platform to stand one..........?

I'm really going to be down to the wire, I doubt I'll get it "ALL" done by next Sunday, the turning club meeting day, but I'll give it a go. Need to do the lathe stand, and then only another two cabinets, but they could wait, I guess.

Cheers!:wave:
 
Next Sunday? Next?...:doh: Sheesh, you've got a whole week!

:rofl:

I do hope you are going to paint the stand before you put the lathe back on.:thumb: If you don't do it now....you'll never get it done, I fear.:huh:

I see a nice "Kirkland Signature" bucket of something on the cabinet in your first pic. Bit of trivia; Costco is headquartered in Issaquah, Washington...just south of me. Kirkland, WA (Kirkland Signature brand) is located just west of me.:thumb:
 
...You will also notice that there is a spot for a wrench as well, I guess if your load is really heavy, the wrench on there would do if you can't lift it by finger power? :dunno:...
I know I can get my lathe all the way off the wheels with just finger (and thumb) power. I hadn't checked to see if a wrench will actually fit in the opening, but I think you're right.
 
Ugh, I slept in, must have over done it yesterday :doh:

Paint, we don't need no stinking paint :D

The bucket is the laundry detergent, works OK, but I just LOVE them buckets (hard to find here).

Yeah, the wrench works, says right in the product description about using a wrench on a really heavy load.... :wave:
 
Well, it was a late lunch, I guess.....:rolleyes:

Got it done, the DVR is now mobile! :thumb:

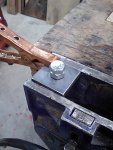
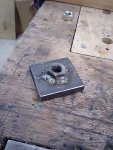
nut_to_be_welded_to_plate.JPG
I started with 4 pieces of steel bar, 5cm square by 8mm thick, I drilled a 13mm hole in the center of each plate, then I put a bolt though the hole, with a 12mm nut on it to be welded to the plate..........

nut_welded_to_plate.JPG
Welded!

Next the four plates will be welded onto the bottom of each leg........

plates_welded_to_stand.JPG
Like that!

Now I have to put the 12mm studs into the casters......

caster_with_stud.JPG
and we are ready for some new shoes!

new_shoes.JPG
Now I just have to tip this beast back down to the floor, without dropping it!

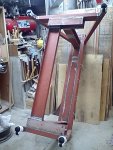
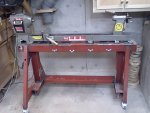
lathe_stand_is_mobile.JPG
And we have a mobile lathe stand!! :D

mobile_dvr.JPG
Lift (BARELY) the lathe back onto the stand, and we are set to make a mess......

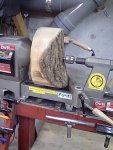
big_ugly_chunk_o_wood.JPG
I had this BIG UGLY chunk of wood sitting around, when mounted and spun up, it sure made the lathe wiggle, but the lathe would NOT dance at all, so I consider this to be a success!

Is the lathe sitting on the pads of these casters as solid as it was when it was sitting directly on the isolation pads I had, on the floor...? Nope, it is not, but it is darn close, and close enough for 98% of the turning I do.

On the casters the whole lathe does move fairly effortlessly across the floor, now if my floor was SMOOTH it would be even easier..... :rolleyes:

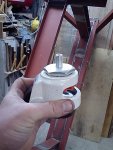
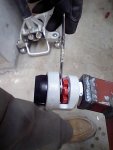
wrench_fits.JPG
When it comes to lowering the pad, I can get them down fairly well with just my thumb, on the red turn wheel, but the 13mm (1/2") wrench does fit in there nicely and it easy to use.

As I wired up the lathe and had that big ugly chuck of wood on the lathe, well, I just HAD TO turn it...... :D

mobile_mess_maker.JPG

Seems I've not forgotten how to do this spinny stuff..... :thumb:

Now I have a bunch of cleaning up and reorganizing to do, as well as maybe make one or two more cabinets......

Cheers!
 
Last edited:
I know, no paint, but it takes time to paint stuff, and I don't have any time, plus the Dungeon is real dusty right now, and the paint job would really suck, add to that, the cool spell (sorry can't call it COLD) we are having puts the painting option on hold as well.

What is wrong with brown primer :dunno: :D :wave:
 
What is wrong with brown primer :dunno: :D :wave:

Don't make me start another "what colour to paint Stu's tool" poll!!! :rofl:

At the rate you're going, each tool gets a new colour it seems. So blue is out, as is Kermit green, and I forget what colour you settled on for Phoenix. :thumb:
...art

ps: cool? We've finally got some -12 (nights) right now and we're loving it, as we're finally able to lay down some water in the backyard rink and have it freeze. I'm going to be out again later setting up the hose to flood the rink. I want at least another full 1" down over the whole thing.
 
Ummm....I think I remember Stu saying he wouldn't turn the lathe on before he was finished with the cabinets?:dunno::huh::p

I doubt any of us could have done it...well maybe Ken.:D
 
Now wait a second, did I say WHICH cabinets :D

I just had to give it a test spin......... :rolleyes: :D

Back to hauling stuff around and tying to make that 10 pounds fit in a 5 pound sack :doh:

Cheers!
 
I cleaned out a LOT of stuff that had built up in various spots around the Dungeon, what a messy dirty time, but worth it!

I knew it would be a dirty job, so I wore my "Dust Be Gone" mask, and that thing was just about black after I was done, the dust that was everywhere in that corner was really bad!

Now I want to avoid this problem in the future, I do not want this corner to become a collection hole for stuff, like it was, the problem is the space is not very user friendly.

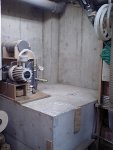
nw_corner_empty.JPG
The space is 133cm wide, by 128cm deep (52" x 50")

You can see my vacuum rig there, it is now short and wide, I'm going to redo it a bit and make it tall and narrow, but stacking the two air tanks on top of the vacuum pump.

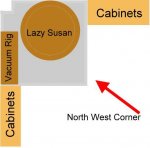
Here is a diagram I've quickly done up.

lazy_susan1.jpg

This is a top view of the space, I'm thinking that a big lazy susan type of thing would work, it would not use all the space, but it would use most of it, and I would have access to most of it.

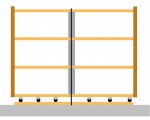
lazy_susan2.jpg
A side view. First layer, would be screwed to the concrete, and then the bottom layer would have a bunch of casters screwed to it, sections of pipe in the middle, with a long length of all thread down the middle, and some support pieces out of th edges, I know it is a rather poor drawing, but I hope you can get the idea.

What do you think, would this work?

Cheers!
 
Do you mean to have a square shelf unit on a lazy-susan bearing? So it has front and back access that you spin around? Or did you mean actual round shelves?

I'd go with the square, myself, as I think it'll work better.

One suggestion - either put doors on it, or put a substantial lip at the front of each shelf. you really do NOT want anything falling behind the lazy susan. Consider that once you put it up there, and bolt it down, it isn't coming down again. So if anything falls behind, will you even be able to get at it?

best,
...art
 
Bean bag chairs, they still make those :eek: :dunno:

Art, I'm thinking round shelves, square ones would not be very efficient for space usage.

A lip is a good idea, but I imagine this thing would not be going round very fast.... :dunno:

Good ideas just the same, keep them coming! :wave:
 
Art, I'm thinking round shelves, square ones would not be very efficient for space usage.

Now you tell me!
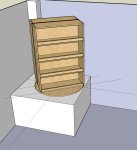
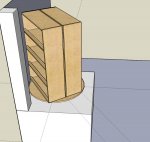
This is what I was thinking:

Front:
shelffront.jpg

Back (with side wall hidden to let you see):
shelfback.jpg

I think that boxes, tools, and things would probably fit neater on a square shelf. Yeah, you might lose some space at the front/center of the shelf, but you could work around that also I bet.

...art
 

Attachments

  • stu-shelf.skp
    103.9 KB · Views: 0
Top