Work Trailer

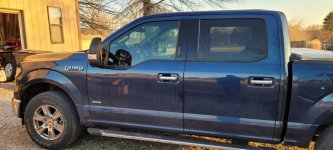
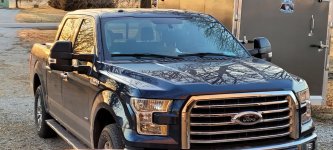
So my F150 came equipped with the tow package, but no brake controller. Turns out the wiring for the controller is under the dash, so I ordered the controller. It arrived today, so tonight I popped off a couple of the dash panels and installed it, then using the Forscan software was able to flip a couple of bits in the computer to enable it, nice little $40 upgrade.

We've also been starting to look at small travel trailers, so I'm ready for pulling it as well should we decide to do that as well.
 
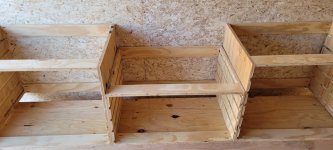
Here's the first revision for the cabinets to accommodate the CMS. Still thinking I'll do something more than a shelf on top of the cubbies. I'd like to incorporate a vacuum hose or two in for dust collection also.
MobileWorkshop2a.png

I've also got a solar kit on order, along with a battery, LED lights, and some other electrical components. I'll try to get down to the metal shop for some steel later this week. I'm somewhat tempted to pull all the wood siding off inside, insulate with foam board, and take care of wiring while I've got it open.
 
Last edited:
I'll bet all of the interior wood is a big part of the trailer's structural integrity. For dust collection, how about a DC port so the DC can sit outside and pull out the dust/air?. Liking the sketch up design! Harbor Freight has some great prices on 12 volt solar panels if that is what you are looking for.
 
I'll bet all of the interior wood is a big part of the trailer's structural integrity. For dust collection, how about a DC port so the DC can sit outside and pull out the dust/air?. Liking the sketch up design! Harbor Freight has some great prices on 12 volt solar panels if that is what you are looking for.
Yeah, I wouldn't doubt it. will put it all back, but the couple of pieces taken off to inspect came off quickly and aren't glued in any way, so easy enough to open up, insulate, and put back on. May let me recess some switches and keep the wiring for the new lights tidy also.

The solar stuff that HF carries now looks to be made to be portable, the kit I ordered should be mountable on an RV and hold up to the wind and such. I'm also thinking they are using polycrystalline panels, which are cheaper to produce, but aren't as efficient as the monocrystalline panels.

The kit I got does come with the PWM charge controller, which isn't as efficient as an MPPT controller, but will work for now and isn't as expensive. It is something I can upgrade later, along with adding LiFePo4 batteries. The LiFePo4 batteries are quite expensive, but besides being lighter you can use more of the power stored in them, where the sealed lead acid batteries you normally can't use more than 50% of the stored power.

Since mine is mostly going to be for running the led lighting and keeping tool batteries charged, I should be ok with what I ordered for a bit. At some point it would be nice to not have to rely on shore power.
 
Having had DIY cabinets in my Cube Van, I learned early on to use a cabinet design that kept things from sliding out when I got the van on sideways sloping terrain. Stop strips along the bottom of the open cubbies and vertical hinged strips to close against one edge of the drawers and latched (pad lock hasp and D ring carabiners). Major bumps and slopes still knocked things loose, but not near as bad as before adding these. I also learned to use a piece of thin and easily breakable wire to hold the latch closed on the fire extinguisher rack (DAMHIKT). Bungees should be used to secure the larger tools and equipment too.

Charley
 
I stopped by the tractor supply on the way home. Found som nice sturdy, but "lightweight" chocks, picked up a fire extinguisher, and a couple of large etrack cord hooks.
20210303_182142.jpg

The extinguisher went by the back door, but may grab another for the side door too.

I hooked up and went to a local parking lot that is quite a bit more level than my drive. I did some measuring and found the top of my receiver was at 18" from the ground. If I stood on the coupler it went down an inch. I figured that with the trailer loaded up I'd be down another inch or two. The trailer level, unhitched was 14" off the ground, so I'm going to try a 2" drop hitch to see how it rides, which should put the trailer about level or within an inch of getting there when loaded.

I also tested out the electric brakes, made driving with the trailer a lot less stressful.
 
I was also a volunteer fireman, working up to Captain in the volunteer company, and then I became the Fire Marshal/ Electrical Safety Engineer for a 3.8 million sq ft manufacturing and research facility for 7 years of my working career.

What kind/size extinguisher did you buy? The little 3" diameter 2 1/2 lb dry chemical extinguishers are good for a frying pan or office waste basket fire, but little else. In most cases, you might be better off not even trying to use it, for safety reasons.

I would get a 15 lb ABC dry chemical extinguisher for your truck/trailer. That's the size that I always have with me. It will put out an engine fire, if you use it right, an electrical or paint and thinner or gasoline fire, as well as a wood and paper fire.

While running between the truck and the fire. tip the dry chemical extinguisher end to end several times to unpack the powder inside, or it won't all come out with the available propellant. It packs well from vibration in a vehicle. Don't plan on using just a little of it, because once the powder is in the valve, the propellant pressure will leak down very quickly and the rest will be useless when you can't get it to come out. Commit the contents of the extinguisher to the fire and be certain that you have put the fire out completely before closing the extinguisher valve. Also, don't shoot it at the flames or smoke. You need to fight the source of the fire. It will work best if you use a low sweeping action toward the base of the flames, to kind-of sweep the flames off of the burning material. You can put out a lot of fire with this size extinguisher if you use it correctly, but be careful not to let the flames circle around to re-light what you have already put out. You have to do this right and once, because you won't have enough extinguisher left to try it again. You also need to be close to the fire before you begin to use the extinguisher. As close as you can get is best. If starting back at the extinguisher rack, it will be empty before you even reach the fire. You only have seconds worth of extinguishing material after you squeeze the trigger. With a 15 lb, maybe 15-20 seconds. Make it count.

There are class labels on extinguishers. Class A is for burning wood/paper, B is for paints, solvents, gasoline, etc. C is for electrical, but when you cut the power off it usually becomes a B fire. D is for burning metal like magnesium. I doubt you will ever need a D type extinguisher. The best for your needs is a Type A, B, C dry chemical extinguisher, because it will work well on most any type of fire. It makes a huge mess, but it will work to put the fire out very well. C or BC type extinguishers are usually carbon dioxide CO2, and they will work well for most flammable liquids and electrical too, but these extinguishers are heavy by comparison. On the plus side, there is no mess to clean up afterward. Unfortunately, they don't do well for paper and wood fires. The 20 lb size is the best to have. I can now put out about a 100 X 100' area of burning fuel oil with just one of these 20 lb CO2 extinguishers, but it takes practice.

Charley
 
So been thinking about the 12v and power distribution. I ordered a fuse block for the 12v side.
613bwnhEIHL._AC_SL1000_.jpg

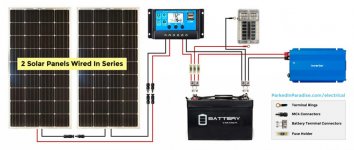
I'll pretty much have it wired as shown below, the inverter I will add later.
200W-solar-wiring-diagram.jpg

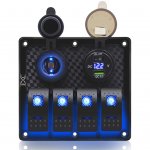
For lighting I've ordered some switch panels and also some SPDT switches (on-off-on) to match the SPST (on-off) ones that come in the panels. One panel will be at the side door, the larger with the usb port will be at the rear over the bench. The SPDT switches will be tied together with traveler wires to create a 3-way setup so the lights can be toggle on/off from either door, may do the same with some flood lights on the outside of the trailer.
71WSOQzQ-jL._SL1500_.jpg 81kVmJMp8+L._AC_SL1500_.jpg

One of the rear switches will also toggle the inverter on/off once I add it, though many do come with a remote switch, so may have a spare or two switches. I am considering using at least one for turning on/off the air compressor, using a relay.

I would get a 15 lb ABC dry chemical extinguisher for your truck/trailer.
Thanks Charley ( & Jim), It was an ABC, not sure it was 15 lbs, I will have to check.
 
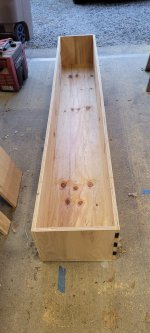
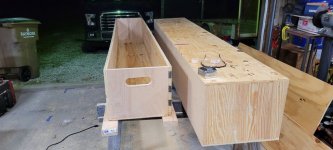
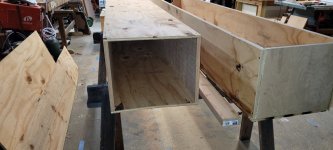
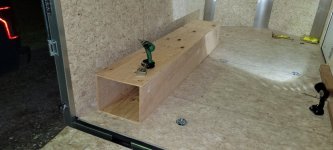
I decided to get started making a few cabinets tonight using the newer Paulk design plans. Unlike the drawing above, there is one large drawer for the base section. which is about 12" x 14" x 94".
2021-03-04 15.49.42.jpg 2021-03-04 18.04.09.jpg 2021-03-04 19.11.55.jpg 2021-03-04 19.12.14.jpg

His plans show it set up to the front edge of the upper drawer cabinets. I've set it back a couple of inches to allow more room for my mower deck. I don't know if it will help, but I did wax the bottom of that monster of a drawer before putting it in there, seemed to slide pretty well.
2021-03-04 19.23.33.jpg 2021-03-04 19.24.38.jpg 2021-03-04 19.24.53.jpg

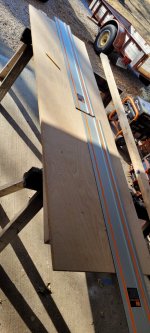
I've got the side panels cut out for the drawer sections. They will be 32" wide each, but I'll need to make adjustments as I'm using 3/4" ply rather than the 5/8" he uses. I'll hopefully get the dado's cut tomorrow. I've got a couple of sheets of 1/2" ply, so should be able to get a start on the drawers also. I'm mostly using up all my old plywood that I can before going and getting more, so there is a bit of mish mash of types (AC Sanded, CDX, Birch, Maple, etc) of plywood being used.
2021-03-04 19.30.48.jpg

I also got the new tongue lock today. I swapped the puck lock that came with it for a different one that I felt has a bit more improved cam lock design though.
2021-03-04 11.36.51.jpg

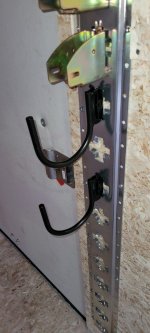
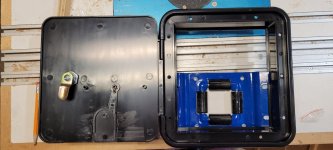
I also got this access door to put on the front corner of the trailer. Inside will be the hose guide for the air hose. Above it I may put in an rv electrical plug.
2021-03-04 19.36.20.jpg
 
Last edited:
Coming along great!
The lock should be a big help in keeping the trailer from moving when you don't want it to.
 
Coming along great!
The lock should be a big help in keeping the trailer from moving when you don't want it to.
Yeah, it should help, not perfect and I'm sure it could be cut off in a few minutes if someone had the right tools and knowledge. Most people aren't going to mess with it, but it certainly will slow down those that will considerably. For that I've also got a camera on the trailers that alerts me for any activity (along with every other direction to the trailers, so at least I will have the opportunity to stop them or call the police.
 
A big welded link chain around the frame just behind the hitch and around a sizeable tree or some other large immoveable object with one of those tamper proof padlocks attaching both ends together, is how I keep mine from moving away when it's not in my yard and near me. I have a hitch lock, but a pickup with a winch can haul it off all too easily, even with a hitch lock on it.

You are making great progress. I used some HDPE tape on both sides of the bottom of my drawers. It comes with a sticky back and adheres to wood very well when left in place for a while. Very easy sliding after that, even with a couple hundred pounds in the drawer.

Charley
 
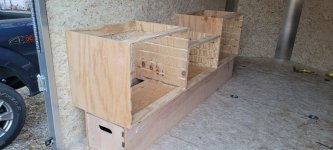
Tonight I got the dados cut for the drawer glide slots and the cabinets assembled and installed.
20210305_171532.jpg
20210305_181118.jpg

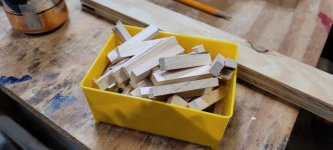
I cut some 1/4" x 3/8" x 1 7/8" strips for the drawer stops, which will get glued in in each drawer glide slot.
20210305_185827.jpg

I need to pickup more plywood to finish up drawers. Then on to the cubbies and a taller 24" wide shelf unit on the end

I did get the battery today, still waiting on the solar panel kit.
 
Last edited:
just a suggestion to go with charley's advice , would making a panel to cover the whole block or blocks of storage space that was hooked in place and taken off when getting to job site, be easier than locking individual drawers Darren
 
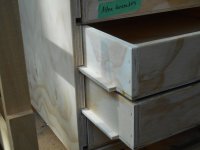
Darren is working from Ron Paulk's plan which uses passive restraints for everything. The drawers are held in place with a small block glued in the cabinet dado.

DSCN0165.JPG

The drawer bottoms are notched so the drawer drops behind the block. The drawer has to be lifted slightly in order to open it.
DSCN0167.JPG
 
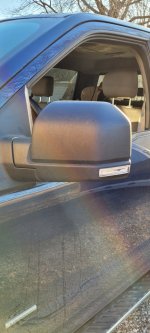
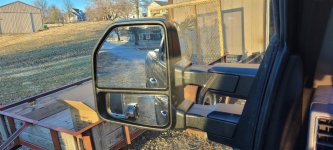
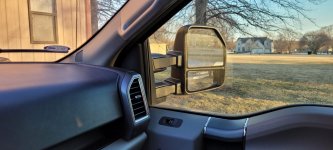
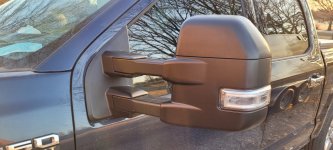
I ordered some aftermarket mirrors for my truck to get a better view around them. They are more of the superduty style of mirror, but have all the same features as the factory ones, then a few loose wires for other features if I choose to wire them up, such as the puddle lights.

The original mirror.
2021-03-07 17.18.59.jpg

The new one
2021-03-07 17.19.05.jpg

2021-03-07 17.49.53.jpg 2021-03-07 17.49.57.jpg

2021-03-07 17.50.42.jpg 2021-03-07 18.03.00.jpg

Extended out they only go about 4" further, but alreaday about 4" further than the stock ones.
2021-03-07 17.54.51.jpg

Both mirror only took about 20 minutes to install, 4 bolts each and adapter plugs.
 
Top