Guest cabin

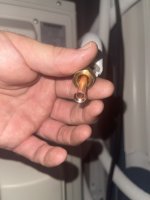
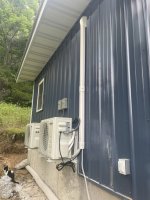
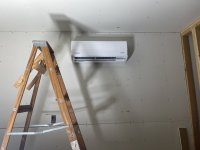
I did get one unit hung up inside and lines ran outside and connected up. The first connection I made I used the new torque wrench to set the 1/4" flare nut, but I didn't feel the click, after several other times of tightening it I realized the clicking was very faint, so it got way over tightened. I had planned to just coil up the extra line behind the outside unit, but after thinking about it I don't want to chance the line leaking from that over-tightened connection once it's under pressure and heat. So I ordered a flare kit to re-do the connection and probably will shorten the lines in the process to make it a cleaner install. I got the outside trim kit installed for the first unit and will wait until the flare tool shows up to finish things up for it. I'll probably lay out, but not install the second until until drywall is complete.
 
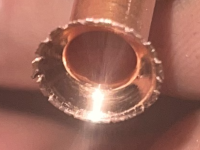
I got my flare tools, but looks like I may need to pickup a pipe reamer, even after cutting, de-burring, and doing my best to clean up the cut, it's pretty jagged when I get done flaring. I noticed the videos I've watched of the process, they really de-burr the heck out of the lines before flaring. So will pickup a reamer tonight.

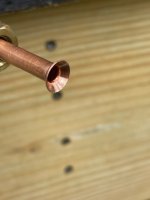
Doesn't look too bad here.
IMG_4967.jpeg

But close up. :( You can see where there was still quite a bit of a burr and some jagged ends that got rolled out.
Screenshot 2023-06-08 at 8.01.22 AM.png

I've already cut the line length down, so will practice more on the cut-off piece until I get the process down better. ;) Then I'll need to practice on the 3/8" line too.
 
Looks like you might be over flaring it meaning tightening it to tight with the flaring tool
Yeah, I need to experiment with it. The tool has a spring loaded mandrel, so I thought it was supposed to stop at the right tension. This and the one before I stopped as soon as it looked like it was seated on the die, but again, I'll have to experiment with it. :)
 
Well, the reamer seemed like just the thing that was needed, it and a little refrigerant oil on the end while flaring, no cracks or jagged edges.
IMG_5006.jpeg IMG_5004.jpeg

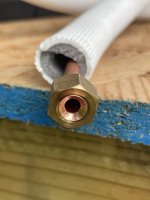
I did have to do that set one more time, still had issues with the torque wrench and over tightened the previous set.

So here is the first one done and running.
IMG_5014.jpeg IMG_5016.jpeg

I’ll tidy up the electrical when I do the next one, which will be after drywall. I set it to 70 and left running while I mowed, there was a pool of water out under the condensate hose and it felt much dryer inside when I checked it later.
 
Last edited:
Just a quick update, the mini split has been working well. The interior feels dry and has been holding steady on these 100* days.

I shut it off while I was packing in drywall, only took about 30 minutes to get it back down to 72 after I finished and shut the door

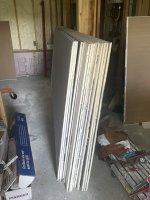
I’ve got drywall to finish the bathroom, the bedroom, and part of the living room ceiling. I’ll see where I’m at after it goes up and buy accordingly. Also picked up a couple buckets of all purpose mud to get taping started. I’ll probably go through about 5 buckets, and will need about 9 more sheets to finish drywall.
IMG_5224.jpeg
 
Looking good! Quite a project for sure
It has been, but with yard chores, summer trips, and other projects it’s not gotten as much focus as it was getting.

I still need to get the septic guy back or just get a tank and bury it myself, dig the water line, and finish the deck too. We have a new sleeper sofa coming in about 8 weeks, so trying to push the interior to the finish.
 
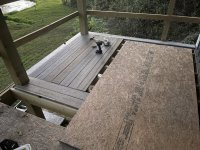
I’ve been storing the decking in the trailer since I picked it up. I’m going to need the trailer soon, so the decking came to the top of the todo list now.

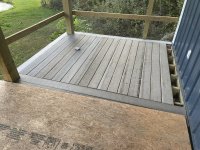
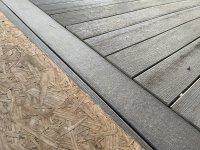
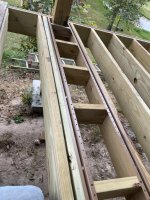
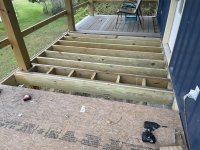
I haven’t installed composite before or used the hidden fasteners. I had to reframe a bit to make things work a bit better, twice, but I think I have a process down to move forward with.
IMG_6124.jpeg
 
I’ve been storing the decking in the trailer since I picked it up. I’m going to need the trailer soon, so the decking came to the top of the todo list now.

I haven’t installed composite before or used the hidden fasteners. I had to reframe a bit to make things work a bit better, twice, but I think I have a process down to move forward with.
View attachment 127312
It looks good. Nice, neat work.
When you have the time, a little review of what you’ve learned installing this material would be very interesting. I’m wondering if there’s an acceptable use for this around our place.
 
Well, so far, use it before it sits on a trailer for 6 to 8 months. Luckily it’s a weathered look anyway, so the blending of the sun bleached boards looks natural. ;) They say UV Resistant/no fading, but it fades.

By not waiting, you also are more likely to remember the pattern you were doing and won’t have to reframe twice. ;)

I’d research fasteners more. The ones that were suggested are actually too short for the decking I bought, they don’t work as advertised.

According to the instructions you screw them down tight for the previous board, then you slip the next boards edge under the opposite side and repeat.

I’m making these work by leaving the fasteners up 1/8” and tightening the previous set after the next board has its fasteners down and left up an 1/8”.

Composite, at least this stuff, requires 12” on center framing, there may be some that does not, so research that. My framers left mine at 24” OC, as they thought it was treated 5/4, which still should have been no more than 16”OC. :rolleyes: I realized they weren’t deck guys, so just asked them to stop and would do the decking myself.
 
Got all but the last board in for the first section of decking.
IMG_6171.jpeg

Found I have one joist with a high crown in the mid section that I missed that is holding up the ends of this section of decking. There is another joist right at the end of the boards supporting them, 3” away. I’ll probably cut and sister the one with the high crown to settle it even with the end joist. Just another thing I need to watch for in doing them.
IMG_6173.jpeg
 
Started on the middle section today. Had to reframe around the post and add the metal strips to screw dow the outer edges from below.
IMG_6197.jpeg IMG_6198.jpeg

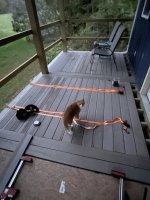
Hazel and Ginger stopped by to supervise
IMG_6206.jpeg

Socks stopped by for the final inspection
IMG_6209.jpeg

One more section to do. I will be adding a landing and changing the direction of the stairs, but that will be later after I do some grade work for the drive up there. We still have the main water line and septic to do, as well as some back fill around the foundation. Then of course finishing mudding, painting, and other finishes.
 
Top