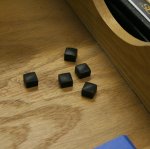
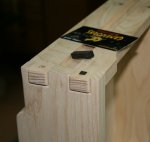
G&G Inspired Nitestands

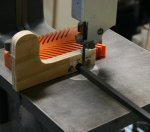
Using the lower stretcher guide holes as a . . . well, guide; I drill the peg holes that will hold the lower shelf. The square top portion of the holes will have typical G&G pillowed square pegs in them.

Hi Glenn.

I have a question to you or whoever want to answer, I see that you first made the square hole and the drilled the hole for the peg afterwards. As I never made one of those I wonder if that is the way to do it or if the order doesn't matter.
To me it makes sense the way you did it because it lets you align perfectly the square holes and then just drilling the round hole on their center.

I think I answered the question myself....:huh::doh:

I think you did too Toni. In this instance I am using 5/16" square plugs and 1/4" peg to hold a non-glued through tenon. I drill 1/4" holes from the top edge of the stretcher down into the mortise opening but no further. I then square the holes with a chisel to 5/16".

After assembly I use the 1/4" holes as guides to continue the 1/4" holes through the tenon and into the stretcher material on the "other side" of the mortise opening. I then drive glued 1/4" pegs into the holes that pass through the tenon and position them as to leave each end of each peg planted in the stretcher on both sides of the mortise/tenon but recessed enough on "top" for me to cover all this with a square plug.
 
The Agony and the Ecstasy

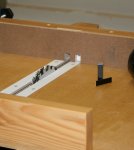
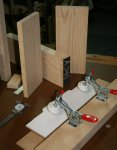
When machining large finger joints, your best friends are a sled, setup blocks and a stop block.

drawers-sled-blocks.jpg

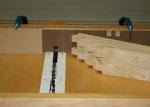
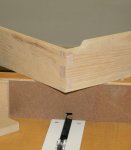
Once you're set up, you can really knock them out pretty quick. These are the sides with the fingers that will sit proud of the drawer front.

drawers-sides-finger.jpg

As I shifted to make the mating fingers on the drawer fronts, all went well on number one. On number two the second cut left a finger that was too thin. How did this happen? My stop block didn't move. I checked the finger position over the dado ZCI and it fit perfect. Then I figured it out.

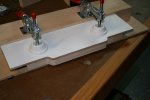
I use the jig shown here with the toggle clamps on it, to pattern route the cloud lifts. The material is referenced off the top edge by seating it against the jig's "fence". On the drawer in question there was a piece of "something" between the top edge of the drawer front at one end and the jig's reference fence. End result? The piece sat askew and I routed in a difference in height of about 1/16" across the length of the drawer front via the cloud lift shape.

Looks OK:

drawers-look-okay.jpg

But Noooooo:

drawers-gremlins.jpg

Had I caught this prior to cutting the fingers, I could have worked around it. The drawers will need to be fitted and I will easily lose a total of 1/16" from somewhere . . . .

Oh well. I grabbed a piece of 8/4 ash off the rack, selected my victim and cut out a chunk. Face jointed, edge jointed and planed the faces parallel. I did a resaw on the bandsaw and planed off the saw marks a bit. The original stock and the resawn boards are shown in the pic.

drawers-new-parts.jpg

I'll have to let the boards relax for a few days before final milling and then I can resume the finger joint activity. This actually sort of works out as I am back to work tomorrow anyway.
 
Last edited:
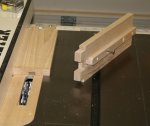
Alright, having made up another set of drawer fronts I'll get back to the finger joints. I'm a big fan of setup blocks as they allow easy repeats of cuts. I use a stop block and a scrap to position the 5/8" wide cut, 3/8" from each outer edge. The MDF backer board is handy while setting height. I want a zero clearance exit point so if I set the blades too high, I will ruin the vertical ZCI while test cutting. I just slide the sacrificial piece over once I've got the height I want figured out.

Fingers-001.jpg

I add a 1/4" setup block to scoot things over and I get pair of 7/8" openings. Like on the first set of cuts, I do one cut and then flip the piece to do the others. Automatic even spacing.

Fingers-002.jpg

This ends up matching the negative of these cuts I did earlier for the sides. They sit proud by 1/8" at the front where they will be rounded and left pronounced. They sit proud about 1/32" at the sides and will be made flush as I fit the drawers.

Fingers-003.jpg

It is interesting to note that except for height I do not have to alter the dado stack to complete all these cuts.

Using the drawer sides as a reference edge I run the material across the dado then turn it and run again. I now have a centered slot ready to accept the drawer runners and still no changes to the stack except height ;-)

drawer-guides-002.jpg
 
Last edited:
Thank you very much for all this thorough thread Glenn.

As I'm a G&G fan too, I've bookmarked it so that when I'll make some G&G inspired project I can come back to it and make my life easier thanks to you:thumb:

Please keep on posting and up with such a high standard job!!
 
Pillow Faced Pegs

Whether you care or not, I needed a coffee break, so here goes . . . There's plenty of ways to make these. Here's what I've ended up with. Bearing in mind that these are decorative caps to cover the holes for the structural pegs . . .

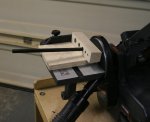
This jig is almost directly taken from the wonderful book by Darrell Peart. I always wondered what I would do with that wimpy little miter gauge that came on my small sander . . . took a while to find what I'd done with it.

The motion is back and forth in the slot whilst spinning the blank round and round. This gives me a consistent pillow shape with well defined shoulders:

Pillows-jig.jpg

With a sponge backer and some 400grit I move as though I am drawing a lot of little circles:

Pillows-400g.jpg

Then the same motion with some 600grit:

Pillows-600g.jpg

Then some hand polishing with finer grits (if I do much more of this I think I will get a rouge wheel for the grinder like Darrell):

Pillows-polish.jpg

Of course I could just lop the end off on the bandsaw. But why do that when I can use the super-duper-specific-depth-setting-pillow-peg-jig? Different holes of different depths for different peg locations on the piece.

Pillows-depth-jig.jpg

And the beginning of the end result, many more to go:

Pillows-done.jpg
 
Last edited:
I can't tell you ho happy I am that you're 'test driving' all this for me! When it comes time for me to dive in I know the waters will be warm and comfy. Thanks!
 
Well, you just did it Glenn,:doh:
Next project I'm going to do will be G&G inspired, so another thing to blame on you.
This G&G projects are addictive, aren't they?:thumb:
 
doing a fine job of showing all the steps in making these glenn,,bravo for your extra effort.. if i can just get to where i can do two things at once ,perhapes i can do some pics of the next project i get into.. thanks again for your attention to details.:thumb:
 
I can't tell you ho happy I am that you're 'test driving' all this for me! When it comes time for me to dive in I know the waters will be warm and comfy. Thanks!

By now everyone knows these have taken wayyy longer than planned. The upside is that once I realized that, I just took my time and enjoyed the ride. Now that all the jigs are made the next pieces should go a little quicker.

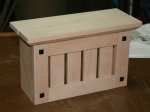
I used the jig to make the pegs on this scrap-bin doorbell cover for LOML (no finish applied in this pic):

Doorbell-001.jpg

Well, you just did it Glenn,:doh:
Next project I'm going to do will be G&G inspired, so another thing to blame on you.
This G&G projects are addictive, aren't they?:thumb:

I really want to tackle a Gamble House piece next. Seems like I can't get enough of that clunky, exaggerated joinery.

doing a fine job of showing all the steps in making these glenn,,bravo for your extra effort.. if i can just get to where i can do two things at once ,perhaps i can do some pics of the next project i get into.. thanks again for your attention to details.:thumb:

One word describes the thing that helped me with my horrible picture taking skills . . . . tripod ;-)
 
Last edited:
Hey Glenn, I'd been following along with this thread, and then I missed it for a little while, checked in today and WOW, you have been busy, I guess you earned that coffee break :D

I've not really seen much of this style, but I'm starting to like the look of it too.

You have infected us :eek:

:rofl::rofl::rofl:

Cheers! :wave:
 
Those Pillow Face Pegs look really neat, Glenn. Sheesh, the next thing we know, you'll be in the jewelry business cutting and polish Gem Stones with it.:rofl::rofl::rofl:
 
Like Stu, I'm just now catching up to the latest in this build, but it's looking good. Looking forward to seeing more.

...I really want to tackle a Gamble House piece next. Seems like I can't get enough of that clunky, exaggerated joinery...
Considering the fact that I live only a few miles from the Gamble House, I really need to make a trek over there some weekend. I really enjoy driving through some of the Craftsman neighborhoods in the area...it'd be great to see the inside of one of the best ones.
 
I've had the pleasure/privilege to take this tour twice. I would heartily recommend it to anyone who likes wood, woodworking, or architecture. You will see more mahogany and teak than you may have ever seen in one place before.
 
Drawer Details

I managed to squeeze in a little time between Christmas presents, fixing LOML's washing machine, hanging a ceiling fan, going Christmas shopping and all those other things that get in the way of our shop time.

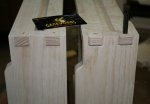
Both drawers are done but here's a shot of the rough assembly on the left, the shaped fingers and drawer front on the right and an ebony peg ready for cut-off.

drawers-rough-smooth-peg-1.jpg

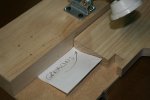
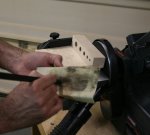
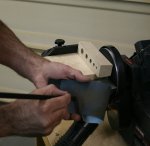
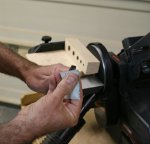
The old GameWorks card makes a good protector during the flush cut.

drawers-rough-smooth-peg-2.jpg

Shear the peg flush so it will clear the case . . . oops, I'll have to do that later ;-(

drawers-rough-smooth-peg-3.jpg

Now I have to clean up to go to a LOML's Christmas party for her work. I guess I may not finish these as a Christmas present to myself after all.
 
I guess I may not finish these as a Christmas present to myself after all.

Glenn, I think just working on this project is the present. All my projects recently have been something that is needed and not necessarily what I would call fine woodworking. I look forward to your next post.

P.S. I am curious how you find bending the saw like that works for you. I have always had better results just cutting it flat, but I am using a flush cutting saw (also Japanese style).

The saw bend was just fooling around for the pic. I saw flat as well. Of course, with me, you never know :wave:.
 
Top