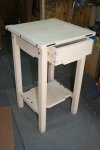
G&G Inspired Nitestands

Glenn, I think just working on this project is the present. All my projects recently have been something that is needed and not necessarily what I would call fine woodworking. I look forward to your next post.

P.S. I am curious how you find bending the saw like that works for you. I have always had better results just cutting it flat, but I am using a flush cutting saw (also Japanese style).

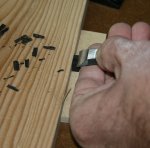
Bill, I'm not Glenn, but I've been using a really cheap Harbor Frt saw (like the one Glenn shows), that I bought a few yrs back, (just to see how I liked one), and it works GREAT either flat OR bending it like Glenn shows, (which I do most of the time). I assumed that if I liked it I would need to buy a good one, but after a couple of hundred cutoffs it's still working like new and I even use it to make fine trim cut offs on moldings.:dunno: I can't believe anything "I Bought" so cheap would work so well, for so many different applications and last so long.:D
 
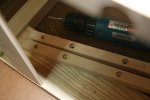
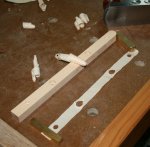
As long as I'm dragging these out till doomsday, they may as well be chronicled. This is the method I prefer for wooden side-runner drawers. They are adjustable and stay put once aligned.

The runner has a number of holes in it based on the length of run or weight anticipated for the drawer. All of these are counter-bored with two or three of them having over-sized counter-bore holes. At the first stage all through-holes are the same.

drawers-runners-1.jpg

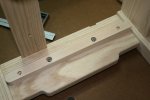
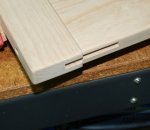
Once the runner is generally in position, mark or drill the larger counter-bore receiver holes (in the apron) using the runner's through holes as a guide. Now drill out the through holes of the oversize counter-bore holes to a size 1/16" or so larger than the screw shaft. This allows for adjustment and the "other" holes can then be used to make the position fixed.

drawers-runners-2.jpg
 
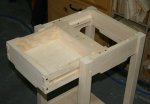
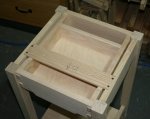
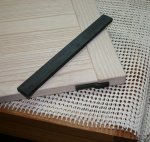
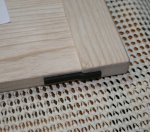
Ooops, forgot shots of the drawer in place. . .
 

Attachments

  • drawers-runners-3.jpg
    drawers-runners-3.jpg
    104.7 KB · Views: 46
  • drawers-runners-4.jpg
    drawers-runners-4.jpg
    107.3 KB · Views: 34
As long as I'm dragging these out till doomsday, they may as well be chronicled. This is the method I prefer for wooden side-runner drawers. They are adjustable and stay put once aligned.

The runner has a number of holes in it based on the length of run or weight anticipated for the drawer. All of these are counter-bored with two or three of them having over-sized counter-bore holes. At the first stage all through-holes are the same.

View attachment 26612

Once the runner is generally in position, mark or drill the larger counter-bore receiver holes (in the apron) using the runner's through holes as a guide. Now drill out the through holes of the oversize counter-bore holes to a size 1/16" or so larger than the screw shaft. This allows for adjustment and the "other" holes can then be used to make the position fixed.

View attachment 26613

Keep them coming Glenn, eventually I may ask you to build a couple of those for me:)

BTW Are roberston screws those you're using on the runners? Have they cilindrical heads like Allen bolts? Any specific reason for that?
 
BTW Are roberston screws those you're using on the runners? Have they cilindrical heads like Allen bolts? Any specific reason for that?

The cylindrical head on these is a little lower profile than a regular pan-head but, as it turns out I had plenty of room after planing the runners to size so any quality pan-head would have done.
 
I've been working on these too long. While fitting the drawers, these curlies just cracked me up:
 

Attachments

  • drawer-fitting.jpg
    drawer-fitting.jpg
    107.4 KB · Views: 42
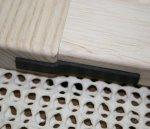
Thought I'd post the spline fit as it is a recurring theme in a lot of G&G stuff. The rectangular spline blank is cut from some oversize stock and block planed to fit. Remembering this piece is decorative but functional in that it allows for wood movement while filling the slot and adding visual interest. The spline is glued to the top but not to the breadboard. The top can expand and contract and the spline slides in the breadboard slot.

The slot appears in the top and the breadboard. These are cut prior to assembly and have different depths.

spline-slot.jpg

Here the thicknessed spline has been rough cut on the bandsaw to basic shape. The spline should fit like a dovetail or an M&T joint when dry fit; snug but without the need of a mallet to set it.

spline-rough.jpg

A pass with the router takes it to 3/32" proud.

spline-first-pass.jpg

A final pass leaves a 1/16" proud spline to match the pillow pegs that are coming next.

spline-second-pass.jpg

A little hand chisel work to ease the edges and the overall surface will get sanded along with the rest of the top. BTW, the top is upside down in the last shot to better show the reveal.
 
Last edited:
I'm reading this thread for the first time. Things are looking really sharp!

Also, I liked seeing the jig you used in the miter slot on the router table in your original post. I need to make something like that.
 
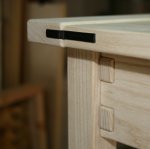
Still deciding on a pull. I've got it down to two handmade selections. Here's the spline and the drawer fingers worked in.

pre-finish-spline-fingers.jpg

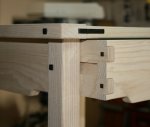
The various elevations between breadboard, top, legs and such.

pre-finish-elevations.jpg

I'm leaning toward a dark mission sort of a color. I don't want to go too dark or I'll lose the contrast between the ebony and the ash. Not much chance of that in this shot; talk about screaming for some kind of finish.

pre-finish-lookin-white.jpg
 
wait a min glenn you still need to do some more sandun.. the bread board end is thicker than the the top.. hurryun to much wernt ya:rofl::thumb: yup they are beggin fer sure.. nice job
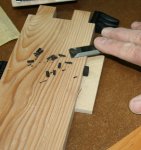
 
Very nice work Glenn. Looks just like all those Greene & Greene photos that have been in Popular Woodworking the last few months and the last issue of Fine Woodworking. I will be interested in how the finishing turns out.
 
A couple of you have been good enough to smack me for skipping over some details. Anyone who has Darrell Peart's wonderful G&G book has seen some variation on these techniques. A simple bench stop allows back-beveling of the pillows. The little riser just helps position the plug to the height I want and is not necessary:


pillow-shape-1.jpg
Start the cut just below the shoulder. The idea is to ease the insertion pressure required and to expose a clear shoulder break that is proud of the surface after the plug is set:


pillow-shape-2.jpg
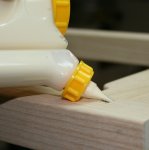
A Glue-bot makes getting the glue in the tight spots without a mess really easy:


pillow-shape-3.jpg
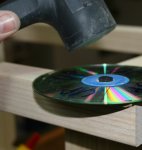
I knew those free AOL CD's were good for something besides starting that man-made reef off the Florida coast:


pillow-shape-4.jpg
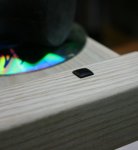
Presto, consistent depth plugs:

pillow-shape-5.jpg

I make the plugs a bit oversize. The forced fit takes care of any imperfections on your square hole plus it just feels good to drive them in ;-)
 
Last edited:
Hi Glenn.

Those look great! However, I have question for you if I may.

As the pins of the drawer will only be seen when the drawer is open, what made you not to put one pin on the center tenon of the front??


Thanks Toni. I did a mock-up of a drawer with pins as you describe but it looked a little busy with the drawer pull and splines. The pull is not in place in the pics so the front view looks a little plain. I think you'll see what I mean once I get the pulls in place ;-)
 
G & G tables

Glenn: What a great thread. Was wishing it would never end. Was so informative with all the neat pictures and explanations. It is pretty obviouse that you have done this many times before. Fantastic job on the tables. Would like to learn more about this style of building. thanks again for sharing.
Ron:D:D:thumb:
 
Top