Shop build

Mark Patrick

Member
Messages
108
Location
Loxahatchee,Fl
This has been a long process I will start with saying that. When I bought this house 10 years ago the plans were to build a shop for "my toys". The deal with "she who must be obeyed" was that she got a pool and tile thruout the house and I got my shop. Fast forward to September 13th of 2020, I finally got the cash together to pay for the building. We signed the contract on that day and we were off. I am glad I signed when I did as very shortly they would update pricing to almost double .

We broke ground in October only to get our first issue. The survey company came out to core sample the corners of the building pad. Well 3 out of 4 were perfect and the 4th they stated was a disturbed area and would need to be excavated. They stated there is no way that what they hit 5 foot down was cap rock ( common in this area) and it needed to be dug up.

I got a small hoe rented and started to excavate the corner. At 5 feet I pulled up with a little help a 5.5 foot long 4 foot wide and almost 2 foot thick piece of Limestone cap rock. The core drill hold damn near dead center. The engineer had argued with me that it can't be cap rock as my lot was an old pineapple farm. I politely sent him photos of the rock with the core drill markings and told him he could feel free to say he was wrong at any time.
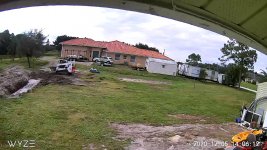
pre fill.jpg

With the go ahead from the engineer and survey crew we started to bring in fill. In total it took 46 trucks of fill.
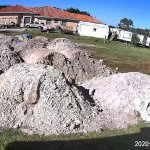
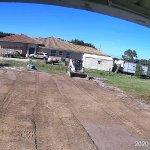
shop fill.jpg


pad level.jpg

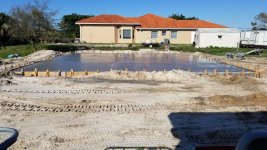
We got it compacted and formed up for concrete, had it termite treated and had the compaction density tests done.
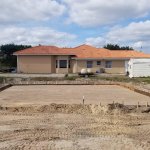
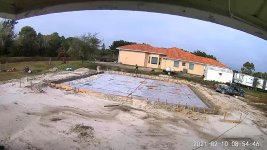
slab form.jpg

visquine and rebar.jpg

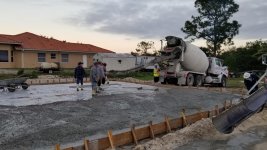
Pour day came on a Saturday morning, crews were here at 5am and trucks quickly started arriving
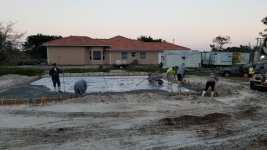
pour 1.jpg

pour 2.jpg

poured.jpg
 
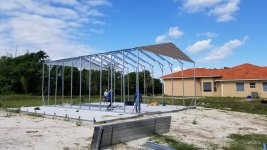
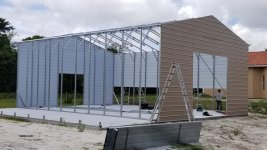
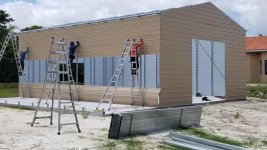
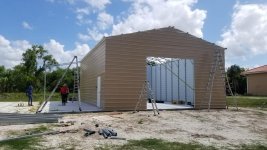
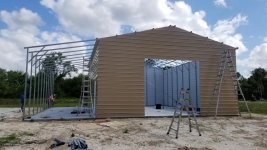
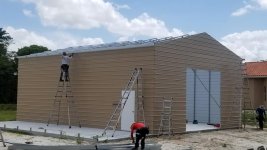
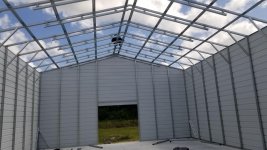
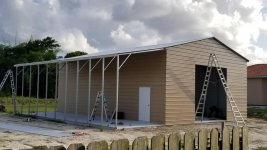
So we sat with a slab for quite some time. It was poured and finished in February of 2021 it would end up being a few more months till the building was actually installed.. When the day came I was surprised to see that it was a crew of 4 guys with the building on a gooseneck trailer to install. I was more than happy to lend a hand as a former GC I had no problem with the physical labor or technical portion, my spanish however is marginal at best so communicating was mostly done like a tourist in Mexico but we got it done. It took them 18 hours total to go from slab to finished building..

frame 1.jpg

frame 2 with siding.jpgframe 3.jpg

sidewing start.jpg

sidewing up.jpg

siding complete.jpg

interior.jpg
 
Now came the fun part. I installed a 100 amp panel and a low voltage pipe in from the house. I have true fiber optic internet here so that will be in the shop for the cameras as well as for signal since you damn near get blanked out signal wise once you are inside and the doors are closed.

I am currently at the electrical phase so we are installing the outlets and lighting hopefully this week. I will throw up some other photos of the interior shortly and some pictures of the layout drawings I have made for equipment and dust collection.
 
Some layout pictures

8da0c89c2279f9632212898b42ba9337.jpg


6318558a061bf053511e3e28c4e964f2.jpg


9bc5a0d0c5bfa748022b4f6a69643b73.jpg


47f7312eaf5589fd5e505a448d6842ba.jpg


524a724c1a5422103861462d04d4989e.jpg


Sent from my SM-G973U1 using Tapatalk
 
If you haven't finished yet, my recommendation is to install twice as many electrical outlets as you think you will need.... I installed min every other stud, on 24" centers, and wish I had gone to every stud around the building. And I didn't install 220, but wish I had.
 
Wow, Good looking shop and boy, what a time getting it built. Looks like you’ve done a lot of planning and like the cleat wall system.

One thing to consider is when you start building/adding cabinets, and tool stations. Try to get them all at a consistent height, such as the height of your table saw, or get them all at a height that is comfortable for you to work at.

When running boards through or when you have really large projects to support, you’ll appreciate being able to slide the piece over to the nearest cabinet.
 
Looks great Mark. Do you plan on any insulation and air conditioning?
Yes at some point. I got a quote to spray it with foam and I ended up putting that money into taking all the insulation out of the house and spraying that instead. Figured I had worked outside most of my life in hot enviornments so I could deal with opening the doors and working in the shade.

I do plan on adding a 20 x 30 loft that will be insulated and air conditioned but that will be a office/ clean room/ menapausal fallout shelter.

If you haven't finished yet, my recommendation is to install twice as many electrical outlets as you think you will need.... I installed min every other stud, on 24" centers, and wish I had gone to every stud around the building. And I didn't install 220, but wish I had.

All of my equipment will have dedicated breakers with stand alone circuits to them, additionally I have a 60a welding plug inside and outside on the lean to. I also have quad outlets every 8 feet on the workbench side . The other side of the shop is going to be the mechanic/ blacksmith side. Most of what is going over there runs on propane or oxycetelene gas. There I spaced the outlets every 12 feet with a dedicated one for each welder and one for a future plasma cutter.
Wow, Good looking shop and boy, what a time getting it built. Looks like you’ve done a lot of planning and like the cleat wall system.

One thing to consider is when you start building/adding cabinets, and tool stations. Try to get them all at a consistent height, such as the height of your table saw, or get them all at a height that is comfortable for you to work at.

When running boards through or when you have really large projects to support, you’ll appreciate being able to slide the piece over to the nearest cabinet.
I am attempting to do that. The cabinets that are in place I pulled out of a job site at the Biltmore hotel on Palm Beach. Spent a day with a crew and got enough high quality cabinets to install all in the garage, new laundry room, solid wood built in pantry, solid wood closets for all 3 bedrooms and it cost me damn near nothing just labor for 4 guys for 2 days. I am raising the cabinets as you can see to make them a bit taller than the standard countertop. Raising it 3 inchest made all the difference in the world for my back. In between those cabinets I have my Craftsman radial arm saw built into the countertop with a replaceable table. That should make crosscuts on my material easier to break down and not having to worry about my Dewalt Miter saw having to sit so far off the wall..
 
Amazing what a good crew can accomplish. Looks very nice! Ceiling fans? Is condensation a concern if you don't insulate?
Very little concern for me right now. When I do insulate the thickness of the spray foam will turn the thing into a giant Yeti cooler. I have heard of some who insulated very well but had the plastic in between the metal and the insulation and their building condensated so much it rusted out the fasteners.
 
If you haven't finished yet, my recommendation is to install twice as many electrical outlets as you think you will need.... I installed min every other stud, on 24" centers, and wish I had gone to every stud around the buildin

Having two 120v circuits with alternating outlets can be real handy if you happen to end up having a couple of temporary high draw tools you want to use close to eachother (i.e. a vac and a saw/router/other similar tool). Color coding the outlets and/or covers also makes it easy to track.
 
Having two 120v circuits with alternating outlets can be real handy if you happen to end up having a couple of temporary high draw tools you want to use close to eachother (i.e. a vac and a saw/router/other similar tool). Color coding the outlets and/or covers also makes it easy to track.
Or to convert to 220v, if they are on separate phases, just run a 3 wire with ground to the box, and swap the single breakers to a 2 pole.
 
Top