- Messages
- 8,179
- Location
- The Gorge Area, Oregon
In my bowl post last week Jonathan Shively asked for some better pictures of the feet. Well I had a couple of other bowls mostly done or in progress so I thought I'd wrangle them up and try to get some pictures of a few different ideas instead of just the one bowl. I also thought it might be interesting to start another thread to see if other folks had thoughts on this subject.
The basic idea is that when you turn the bottom you leave enough material that you can carve a bunch away and leave behind a couple of feet sticking up just tall enough that the bowl will sit on them without the actual bottom touching. If you do it right (and I sure don't always..) you can turn a ring on the bottom then lay out the feet on the ring and just carve away the parts of the ring that aren't the feet. This is a bit tricky because you have to match the curve inside and outside of the ring before carving it away (a curved template with a notch cut in it can help with that). How much foot you leave is kind of a matter of choice, a lot of the time I'm going minimal but I've got some ideas on some taller ones I'd like to explore as well, it's really a do what strikes your fancy IMHO.
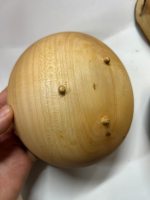
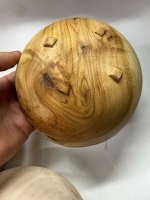
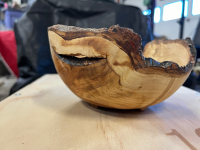
The first bowl here is very much a minimalist set of "feet", just little posts. I did this one a few years back, I believe the feet were actually part of the material left from around a recess where I chucked the bowl. It sits just a touch off of flat.
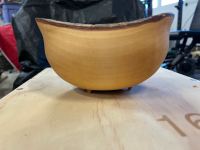
This is the bottom of the bowl from my other post, I see I still have a couple sanding lines after the first coat of oil revealed them to me . I'll hit that with 320 and clean it up later. I went with 4 feet here because I didn't have a lot of material to work with and wanted enough clearance. I had to carve away basically the whole bottom of the bowl as well. I marked the depth in a series of passes with a handsaw and then used a combination of a shinto rasp, a fine rasp, a iwasaki file, some rifflers, and finally sandpaper to finish it. It looks like it sits a bit higher but it also has more belly to the bottom so there actually isn't a lot more clearance.
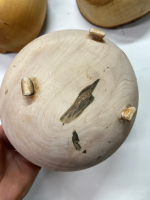
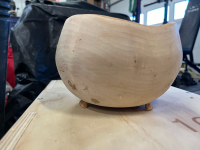
This one is a work in progress and has a bit higher feet. I remember turning these as a ring then carving away the residue. Still needs a bit of cleaning up but you can kind of get the idea anyway I hope.
As with any of this there are undoubtedly a dozen ways to do this, so take the above as the way I've done these three and not necessarily being the only or best way.
If anyone has other points to add feel free to jump in.
The basic idea is that when you turn the bottom you leave enough material that you can carve a bunch away and leave behind a couple of feet sticking up just tall enough that the bowl will sit on them without the actual bottom touching. If you do it right (and I sure don't always..) you can turn a ring on the bottom then lay out the feet on the ring and just carve away the parts of the ring that aren't the feet. This is a bit tricky because you have to match the curve inside and outside of the ring before carving it away (a curved template with a notch cut in it can help with that). How much foot you leave is kind of a matter of choice, a lot of the time I'm going minimal but I've got some ideas on some taller ones I'd like to explore as well, it's really a do what strikes your fancy IMHO.
The first bowl here is very much a minimalist set of "feet", just little posts. I did this one a few years back, I believe the feet were actually part of the material left from around a recess where I chucked the bowl. It sits just a touch off of flat.


This is the bottom of the bowl from my other post, I see I still have a couple sanding lines after the first coat of oil revealed them to me


This one is a work in progress and has a bit higher feet. I remember turning these as a ring then carving away the residue. Still needs a bit of cleaning up but you can kind of get the idea anyway I hope.


As with any of this there are undoubtedly a dozen ways to do this, so take the above as the way I've done these three and not necessarily being the only or best way.
If anyone has other points to add feel free to jump in.

