Stew Mac Body Board

Brent Dowell

Administrator
Staff member
Messages
16,602
Location
Reno NV
So, Of course I had to buy some new tools for working on my new guitar project, (which I'll document separately).

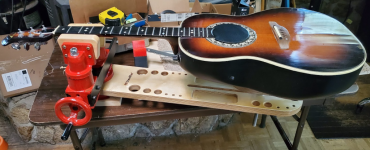
I decided that the StewMac vise and body board looked like it would help with a number or projects.

I'm going to be doing some fixes and repairs to my old ovation, and probably going through the rest of my collection to make each guitar live up to their potential, lol.
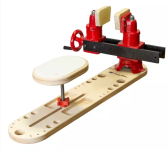
1676075900189.png

So when the only package that showed up from stewmac today was the body board, I decided a nice sanding of the BB up to 220 and a coat of poly would be nice.
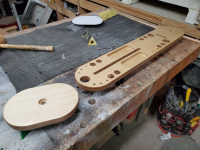
1676076229728.png
 
...So when the only package that showed up from stewmac today was the body board, I decided a nice sanding of the BB up to 220 and a coat of poly would be nice.
Oh no! Now you've gone and thrown it out of calibration. :rofl:

Looks like a handy piece of kit to have around. :thumb:
 
My first thought was “measure that up and make some more on the cnc”, but then saw the vise hardware. I did see some posts about adding magnets to the trays on the comments of the product page.
 
Yeah, It looks like a simple enough piece of baltic birch, but in this case I decided it just seemed simpler and faster to buy than to build.

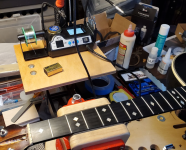
I will be building another little accessory table for it to hold other tools and what not. Hoping the rest of it gets here today, but not going to hold my breath.

At least I've got the main workbench all cleaned off!
 
Your frets came out looking good. :thumb: The first fret dressing job I ever did was on a '60s Les Paul Custom. (It was a customer's, not mine.) I was sweating bullets, but it came out great.
 
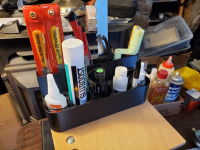
Printed up a little tool organizer for the accessory table.

This is the kind of stuff i do with the 3d printer all the time.

The only issue I had with this is due to the way I designed it, it took 2 days to print, lol. If I had paid a little more attention to wall thickness and the thickness of the base, I could have cut that time way down.

1676837280006.png
 
Printed up a little tool organizer for the accessory table.

This is the kind of stuff i do with the 3d printer all the time.

The only issue I had with this is due to the way I designed it, it took 2 days to print, lol. If I had paid a little more attention to wall thickness and the thickness of the base, I could have cut that time way down.
Is that typical print time, or are more recent printers faster?
 
Print time can vary a lot. This is actually a fairly largish print, so it would take a long time.

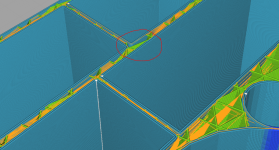
I could have reduced that time though by making the thickness of the walls an even multiple of the nozzle thickness.

If you look at this cross section, you can see that there are 2 walls and then a gap. That gap requires infill and the nozzle will go much slower and zig zag in order to put a bit of filament in between. That really slows down the printing quite a lot.

I could have also sliced it with thicker layers, which would have reduced the number of layers put down, which again, would speed things up significantly

1676838362045.png
 
There are some printers that are faster, but a lot of that has to do with how well you have your machine tuned.

I've also heard that sometimes the firmware involved can affect printing speed as well, and I'm looking into doing a little experimenting with that at some point.

To be honest, the speed at which it prints doesn't really bother me, as I'm generally pretty patient. What I like is making sur I get a nice good quality print, regardless of speed.

With out power out here though, I'm surprised we didn't have a power blip that could have shut down the machine. I do have a spare UPS I'm going to hook up to it though as that would give me a little more peace of mind.
 
Top