Niki Avrahami
In Memoriam
- Messages
- 267
- Location
- Poland
Good day
I would like to share with you my method.
First, check the alignment of the blade to the miter slots.
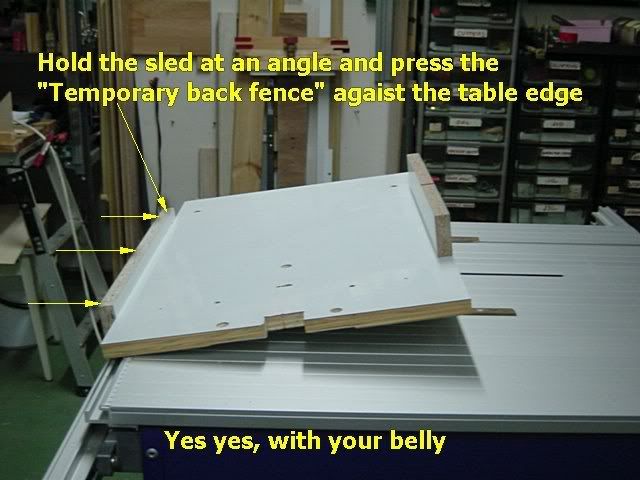
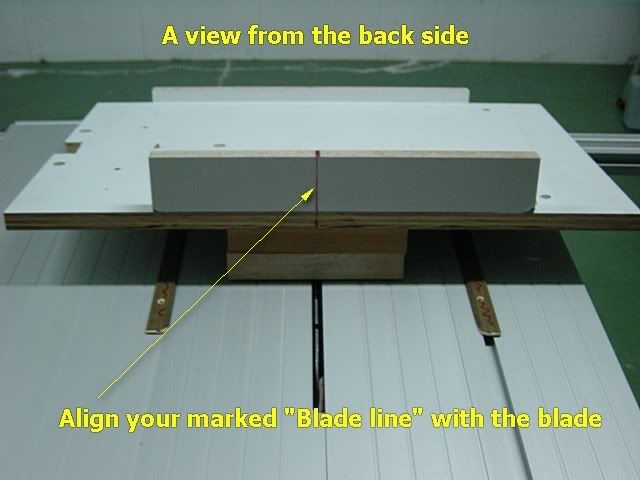
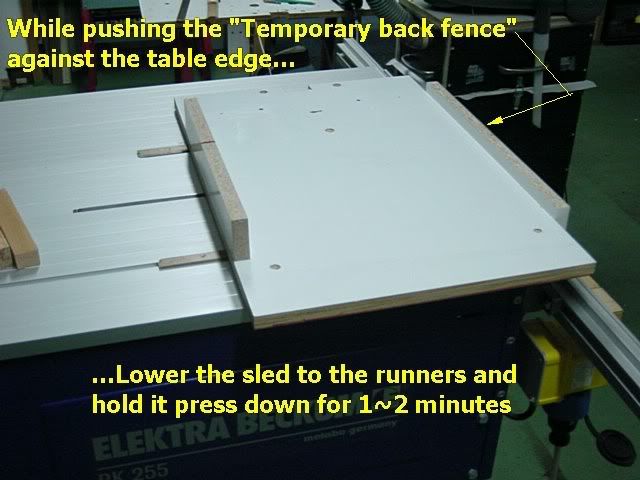
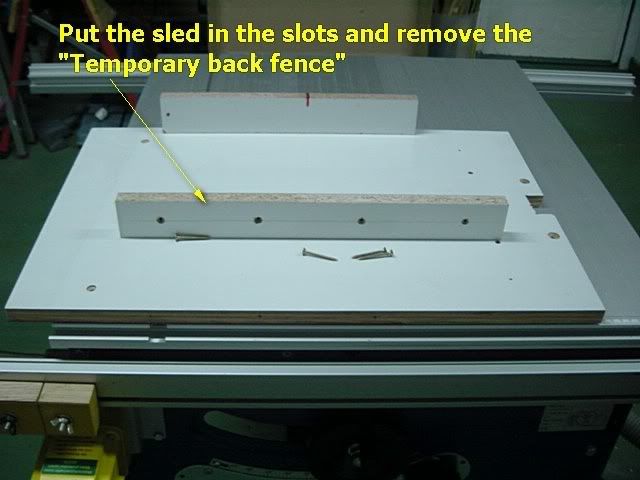
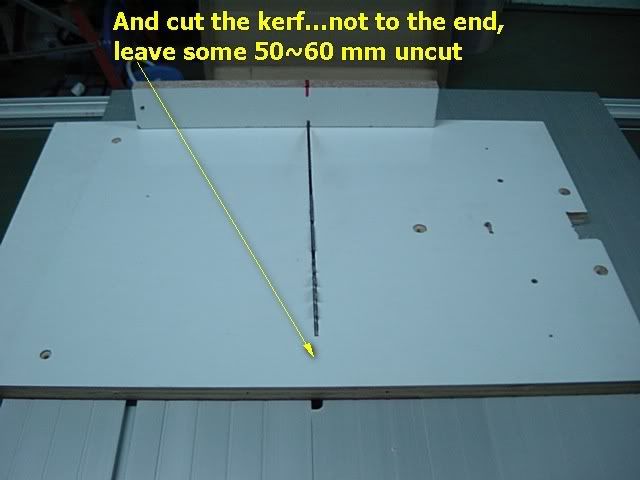
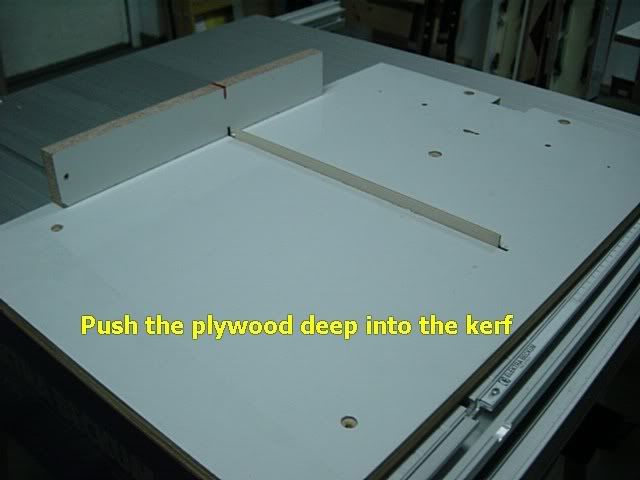
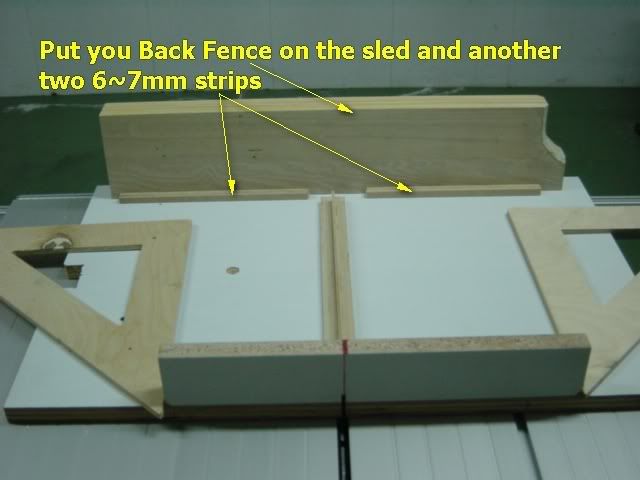
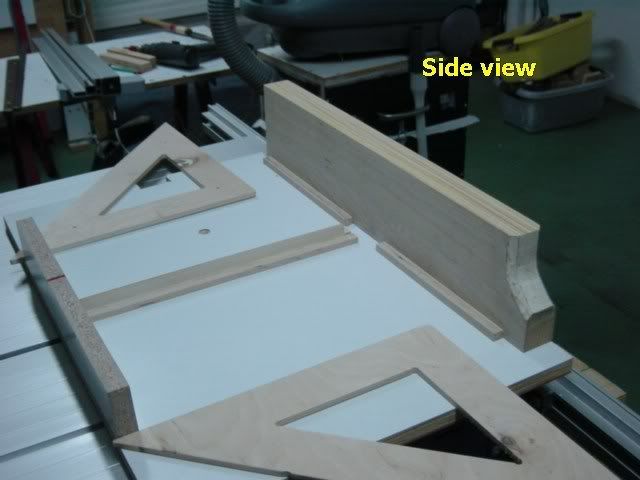
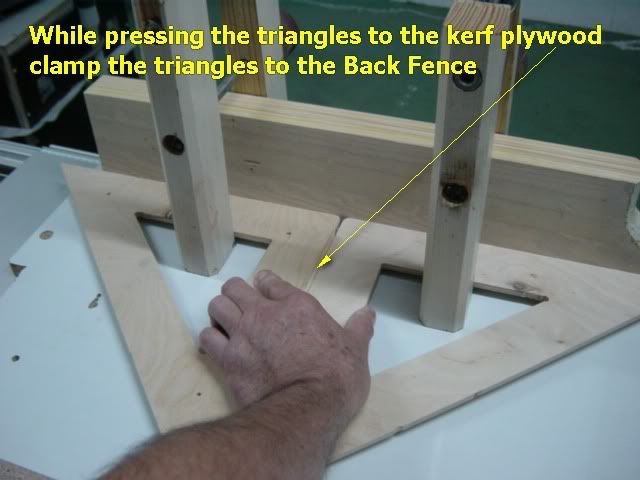
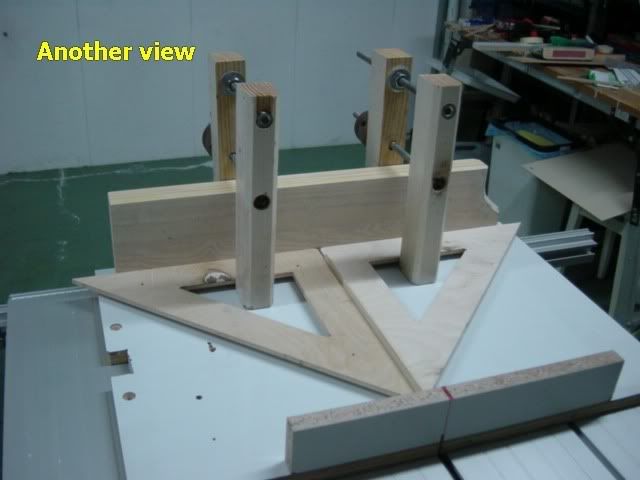
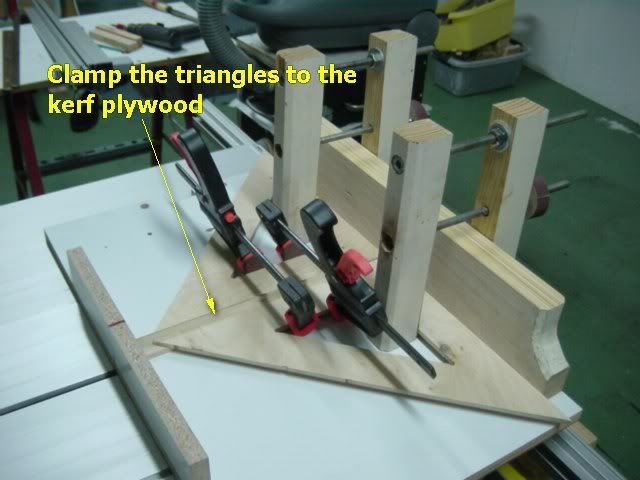
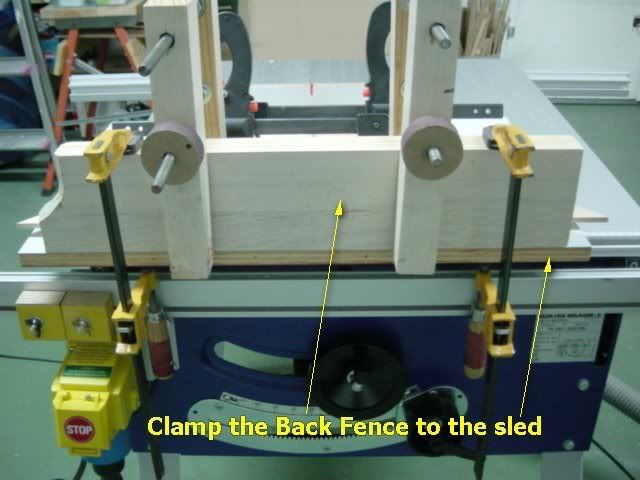
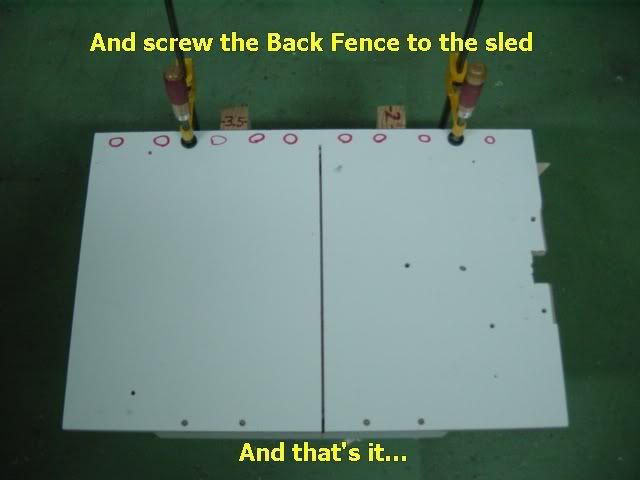
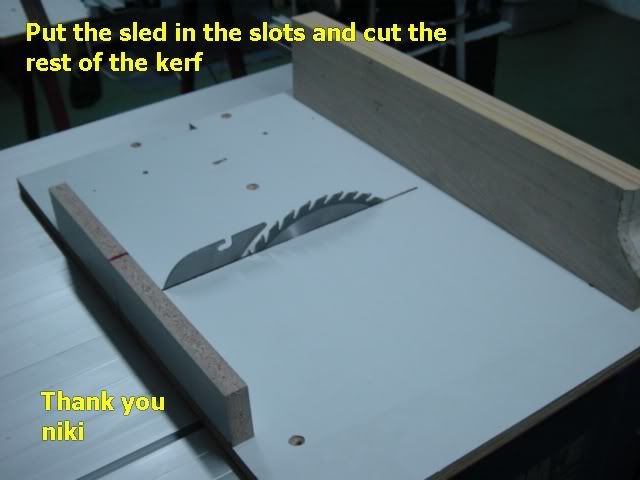
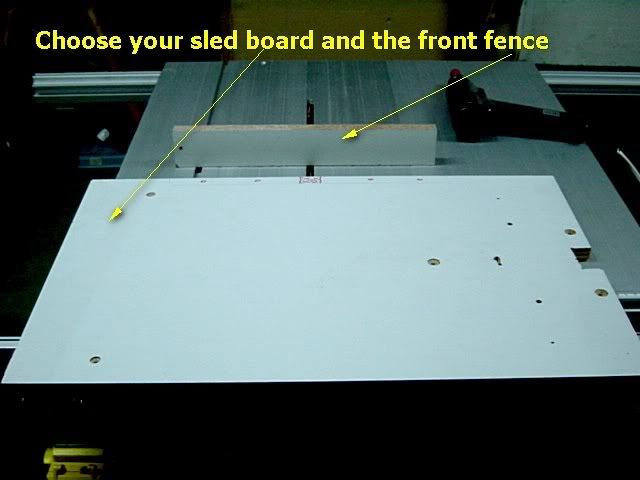
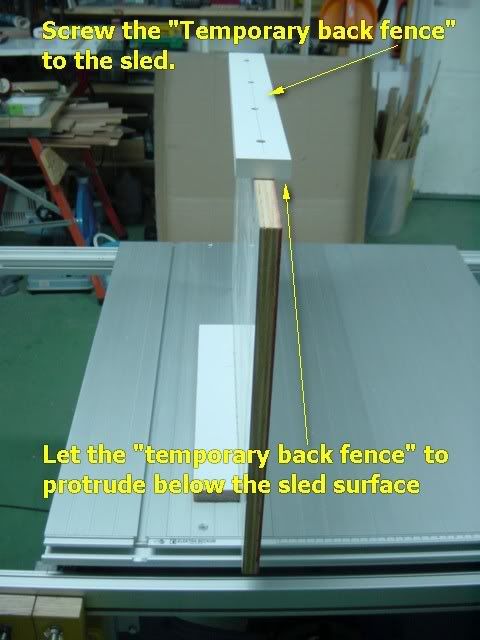
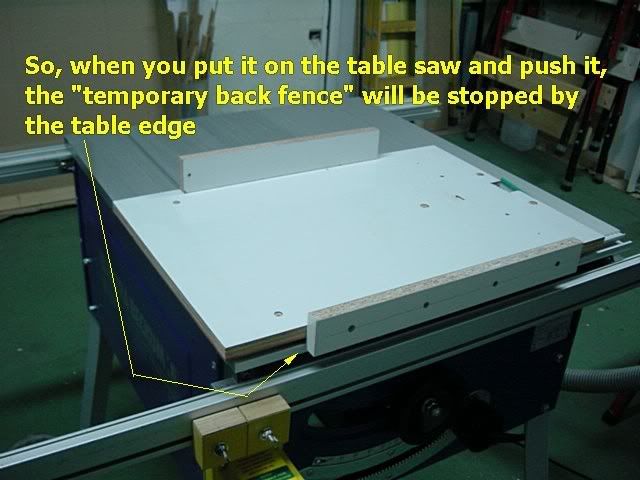
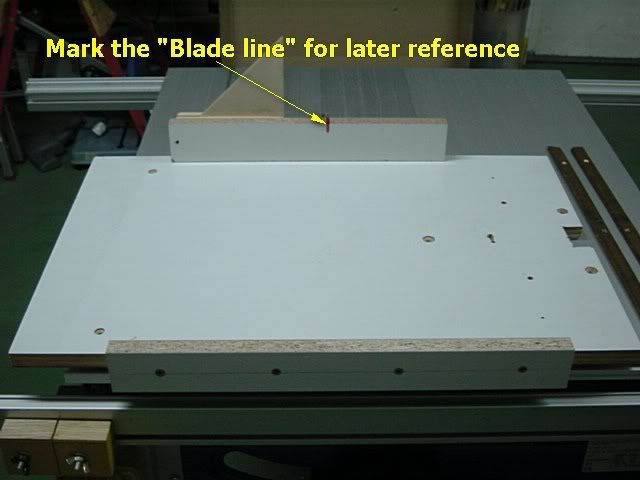
The idea is very simple, I make part of the sled, cut the kerf and refer to it as a reference point (or line) to position the "Back Fence" square to the kerf by "locking" everything together.
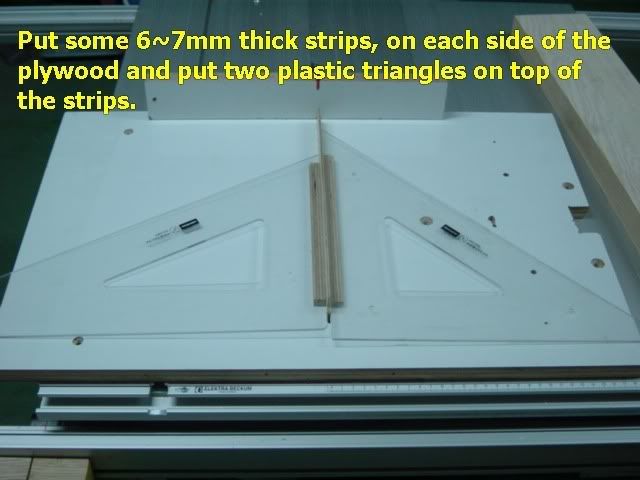
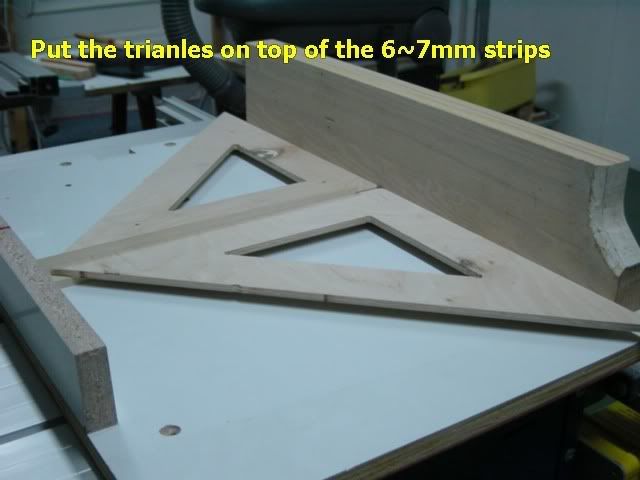
I discovered that the plastic drawing triangles are very, very accurate, and I use them to locate the fence (actually, as you will see, I'm using the shop-made triangles that were "copied" from the plastic one).
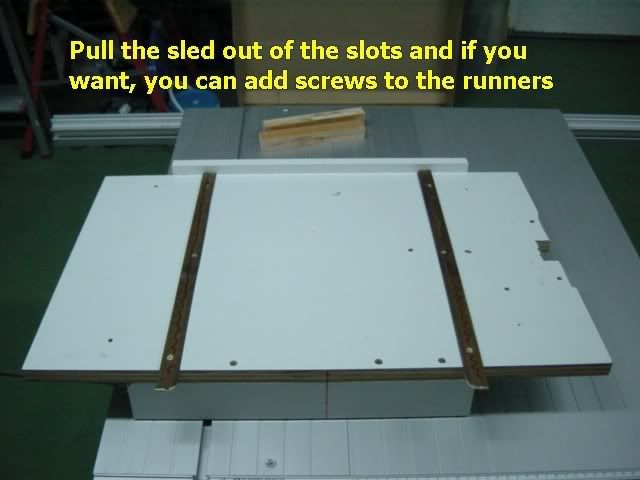
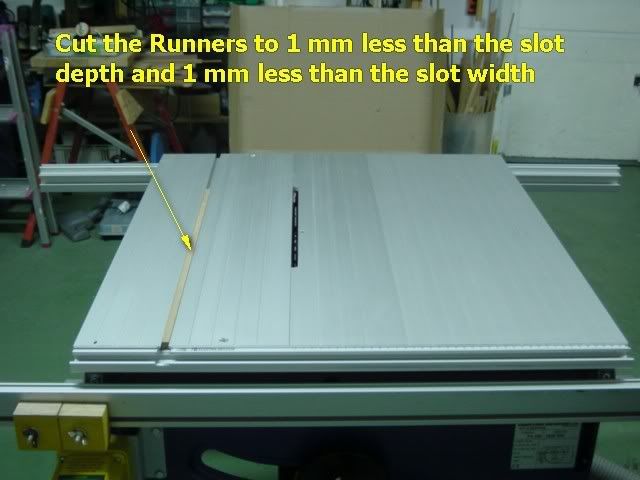
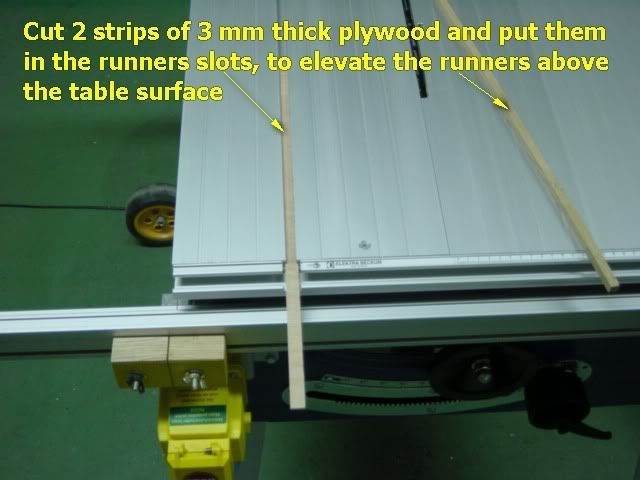
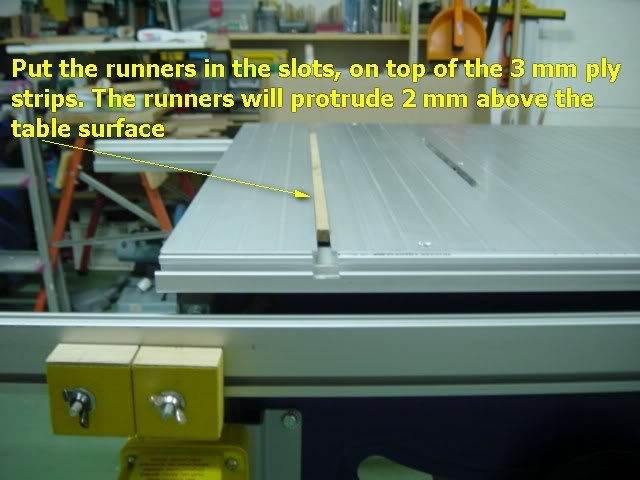
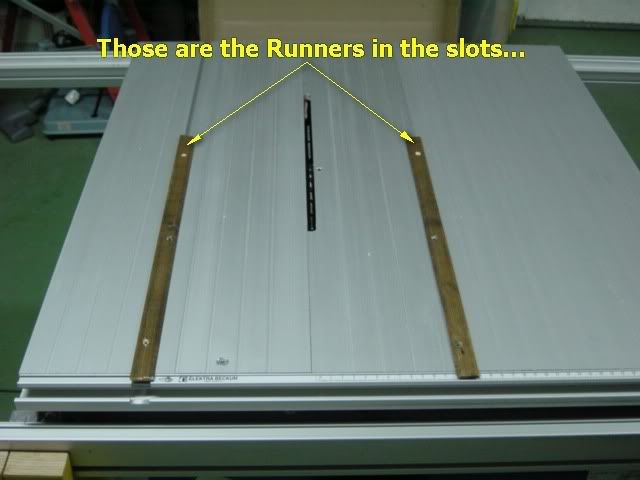
By cutting the Runners 1 mm narrower than the miter slot width, it's very easy and fast to cut the runners and, I think, will eliminate any binding due to expansion with humidity changes.
My table saw is different and has only one miter slot, so I made some kind of "fiction" miter slots for the guys with the "normal" table saw...(I think everybody except me)
It took me around 1½ hours to make it (including 148 pics), so I assume that it should take you 2~2½ hours, considering that you have to prepare the parts (I used scraps from around the garage).
Regards
niki

I would like to share with you my method.
First, check the alignment of the blade to the miter slots.
The idea is very simple, I make part of the sled, cut the kerf and refer to it as a reference point (or line) to position the "Back Fence" square to the kerf by "locking" everything together.
I discovered that the plastic drawing triangles are very, very accurate, and I use them to locate the fence (actually, as you will see, I'm using the shop-made triangles that were "copied" from the plastic one).
By cutting the Runners 1 mm narrower than the miter slot width, it's very easy and fast to cut the runners and, I think, will eliminate any binding due to expansion with humidity changes.
My table saw is different and has only one miter slot, so I made some kind of "fiction" miter slots for the guys with the "normal" table saw...(I think everybody except me)
It took me around 1½ hours to make it (including 148 pics), so I assume that it should take you 2~2½ hours, considering that you have to prepare the parts (I used scraps from around the garage).
Regards
niki