Coolmeadow Creations Shop Construction

Well, I gained a new addition for the shop tonight. Now to see how to use it.
We had to replace the air handler in the house (It's 10:10 pm and they are just finishing up charging the unit. :eek:) I saved the blower (220 volt) and along with it came the emergency heating strips (heat pump system). Hmmmmm. Might I have heat next winter?
I'll have to see if I can make this thing safe to work that way. Otherwise I may just use the squirrel cage to blow some air for the summer time. I hope it doesn't blow me away. I've got a 620 sq ft shop. The blower was installed in a 2500+ sq ft house.:headbang::headbang::headbang::headbang:
My installer asked me if I had 220 in the shop. I mentioned I had a 200 amp service to the shop. He thought that would be sufficient.:thumb: :D Jim.

Well, Jim, if you don't end up using it for either of the jobs you mentioned for it, it would always work good to power a heck of a downdraft Sanding table.:thumb:
 
Well, after the storms last night, I took a tour through the shop. No leaks from the roof. :thumb::thumb: But ground water is still getting in the finishing room through the seam in the concrete. So I know what I'll be doing this weekend. Building a french drain.:( I had already been thinking about it, but wanted to see what would happen in a heavy rain to see if what I had dug out before was enough with the gutters to take care of it. It wasn't. :doh:
Oh well, it's something to do. Hope no one got any damage to their property in this neck of the woods. The cars here at the dealership are pelted, look like golf balls, and lots of glass broken. All the skylights on our service drive and shop are broken out. But life will go on. Jim.
 
WHEW!! I'm beat! I got started on the french drain today. Got back from buying supplies about 11:00. Started digging, and digging, and digging.... I got farther than I thought I would today. Had originally planned to go 'til 6:30 then stop and clean up. Couldn't make it. I still have about 20' of trench to dig for the drain pipe. I had to dig deeper at the sidewalk than I needed to because there is an electrical conduit going across there. I knew it was somewhere close, so I didn't break the CPVC, thank goodness. But that makes the 30' of trench from there deeper and harder to dig. Hope I'm not too sore to get some more done tomorrow. :eek: I'll take some pictures to show the progress in the am. Too pooped to click tonight. Jim.
 
I'm going to be hurting tomorrow!! Wonder if I can call in sick because I'm too sore to get out of bed?? :rolleyes: :D Well, I didn't do pictures first thing this morning, but I did after I finished all the digging this afternoon. Then a few more to show how far I got.
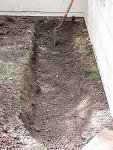
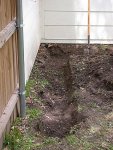
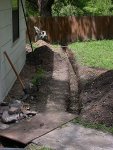
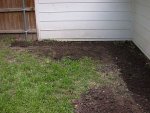
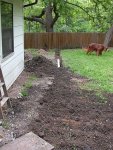
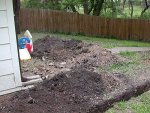
Picture one is the south wall of the finishing room. DSCN1947.jpg Picture 2 is the east wall of the shop.DSCN1948.jpg And #3 is the discharge trench down the east side of the finishing room. DSCN1949.jpg Look just like trenches you have dug before, huh??? :)
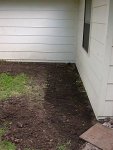
I didn't take any of just the pipe in the trenches, but I should have to show what I did on the south side of the finishing room. Did you notice that that trench is wider than the others? Well, it's because I used a wye just past the sidewalk to that trench and put in 2 10' lengths of perforated pipe, then one back along the east side of the shop. Now that part is all covered in. The pipe is wrapped with the landscape cloth...double thickness on top. 20 bags of rock for drainage (OH my aching back!!), Another single layer of cloth on top of the rock, then a couple inches of dirt on top of it all. I glued the wye and els in, but the straight pipe is just friction fit. Not that I'll be taking this out, but just couldn't see the pipe moving.
DSCN1950.jpgDSCN1951.jpgDSCN1952.jpg
I know that this is going to settle a lot, so I have this in reserve. DSCN1953.jpg to fill back in.:thumb: The rest will be used in the back yard.
I'm one piece of PVC short for the drain, then I'll need to finish off the discharge area so the water will disperse instead of carving a canyon on it's way to the creek. And no, I'm NOT about to run the pipe all the way to the creek!! (another 35 feet or so)
I hope everyone had a good weekend and the rest of you got some shop time. I ran in and out of mine a few times, and I did use the old ryobi miter saw to cut the PVC. Does that count? :rofl: Have a good week! Jim
 
Well, life brought me some good news and some bad news..... The good is my french drain got a little test last evening and came through with flying colors. No standing water at ground level, steady small stream out the discharge pipe. YEAH!!!!
I took the shop apart last night when I got home. Impending bad weather, wanted to get the van inside, and that's the only place it fits. Took about an hour. Went into the shop this am to get the van, and the floor was dry where it had been getting wet before. Another YEAY!!!! Walk aroud to get in the van. There's a small puddle on the floor. No stream going to it, no splatter spots. I feel the ceiling above it, and don't feel anything damp. The van was dry when I parked it last night. So, now I have to figure out where this came in from. :( This is across the shop from where the water was getting in the other 2 times. It is under the part of the roof that has not been redone. And I don't want to think about doing it now. Hopefully I'll get to look at the roof this weekend to see if there is any damage . I was up there Monday night to blow all the leaves off and clean out the gutters, and didn't see anything then, but who knows. Sometimes, it just never ends! :) Jim.
 
...Walk aroud to get in the van. There's a small puddle on the floor. No stream going to it, no splatter spots. I feel the ceiling above it, and don't feel anything damp. The van was dry when I parked it last night. So, now I have to figure out where this came in from.... Jim.

Any chance the puddle came from the van's air conditioner? Could have been iced up a bit when you put the van in, and then defrosted onto the floor later.

Something to hope for, anyway. :D
 
Good thought Jim, but no, the puddle (and it's still there this evening, but a little smaller) is behind and to the left of the driver's door, and about 2' away from the van. And I haven't turneded the A/C on the van yet. It's cool enough in the am that the vent is all that's needed. In the evening, I don't care if I sweat. :rolleyes: The amazing thing, it would have gotten the left wing of my TS wet, and I wouldn't have gone to the shop either time today, and wouldn't have known it. Saturday I would have found a rusted table top. So I guess that is another good thing that happened. The storms last week were much heavier, and much more rain. No problems then. I can only guess that the rain got in through the ridge vent, but again didn't last week with stronger winds and heavier rain. And I still don't feel anything wet above the spot. But now I'm afraid to put the TS back for fear of rusting the top. We are supposed to get some light rain again this weekend, so I may wait and watch for it. Might have to pull a ceiling panel down to see what's happening. That will be fun. NOT!!
Thanks for brain storming with me!! Jim.
 
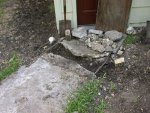
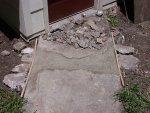
Thought I'd give an update. I had to work a half day yesterday, but I got to spend the rest of the day in the shop...or outside the shop. I finished the patch in the sidewalk going to the shop. This is a picture of how it looked after I chopped it up to get the water to drain a year ago New Years Eve. DSCN1959.jpg And this is how it looks afterward. DSCN1963.jpg (I still need to get rid of the chunks of concrete!) It's rougher than I wanted, and I didn't have quite enough concrete mix. But I didn't feel like taking 45 minutes to run to town to get another bag. I'll skim coat it with something that will cure a little smoother.
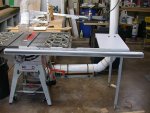
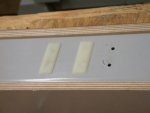
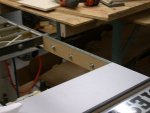
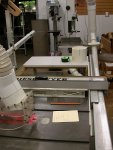
After I got that going, I laid out all the parts for the Bies fence from the Lowes blow out, and started marking and cutting to fit. I moved it where there is nothing to the left side of the blade. I ended up with 48" (If I fudge a little) to the right. DSCN1960.jpg Not quite as much as I had with the stock Ridgid fence moved to the right. But it should do. I can cut up to 60" to the left before I hit obstructions. I need to make a new extension table now. My old one was cupped. So I put the short Biese extension table at the end so the legs will support it, which leaves a gap in the middle for now. I did run into a problem with the "open grid" Ridgid wings in that the pad on the bottom of the fence didn't hit solid CI moving across, allowing the fence to drop and have to climb up on the next ridge. So I pulled one pad off, redrilled holes and mounted it to run on the back section. DSCN1964.jpg Worked great, until I hit that open spot in the table. Took a scrap piece of 5/8" MDF, and laminated one edge, then bolted it into place as a bridge. DSCN1967.jpg Now I have smooth operation across the entire length. DSCN1965.jpg
All in all a very satisfying weekend of work. Felt more like play!! Oh and I mowed the yard today! LOML was happy.
wink.gif
Now I get to help her groom one of the rescue dogs. This may be a challenge! Jim.
 
Last edited:
Hey Jim, just a thought here, but have you considered just removing the open grid CI wing on the right side of your saw, and making a nice extension table the full length that you have now. You could connect it directly to the saw's main table and then have a really nice flat/smooth table, (that can also come in handy for other things as well). You might get the notion that I "HATE" open grid wings, eh?:huh: Well, you would be right, even more, I think, than those stamped steel extension wings. (Guess I've pinched/mashed my fingers and caught things on those things too many times back down the line).:rofl::rofl::rofl:
Hope you find your leak without too much trouble.
 
Norman, I have thought about that...every time I smash a finger!! :rofl: But I have used them for running a C-clamp through to hold a small piece down that I couldn't have done with a solid table. But I do need to build some Masonite inserts for them. Jim.
 
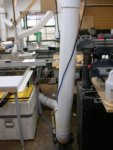
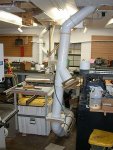
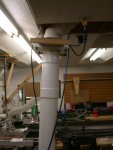
Quick little DC duct work for a Saturday afternoon. Actually, I pulled the TS down tube apart last night, and put the 6-6-4 wye at the ceiling instead of after the 45 el as shown in this before picture: DSCN1971.jpg This is how it looked at the floor level before: DSCN1972.jpg I picked up another 6-6-6 wye on the way home from the dog show today. And this is what it looks like afterward:DSCN1974.jpg This was needed to build a hood for the RAS in it's new home in the shop.
And just because I noticed that I failed to get a picture last weekend that actually showed the fence on the saw, here is is: DSCN1973.jpg
Another dog show tomorrow, my parents are coming down to watch, then we will take them out to eat for a combination Mother's Day/early Father's Day meal celebration. Then back home to mow the yard. Gas jumped 14 cents a gallon from last night to this afternoon. :( I need a fill up, and I need gas for the lawn mower, wouldn't you know. Have a great Mother's day!! Jim.
 
Well, the last 2 weeks I've been working on a new outfeed table and a new extension table...both torsion boxes.
Here is the outfeed table installed. I used some knife-thread inserts for the screws to mount it. Worked very well, except for the one I lost, and the one that broke on me putting it in a trial piece of wood. :eek: DSCN1978.jpg
The outfeed table box is done, but I need some 2" locking casters, that I can't find locally, to get the metal frame the previous owner of the house left for me level. I found it has 2 different types of wheels on it. One pair bolted on, one welded on!!! Well, he was a welder, so I guess that shouldn't be a big surprise. But the 2 types are different heights, so the table drops a good 3/8" or more over 60". So that will have to wait to be totally finished. DSCN1979.jpgDSCN1980.jpg The right side of the top in the first picture is double thickness 3/4" MDF. I made this overhang to have a ledge for clamping as I will be using it for an assembly table for a while. I have decided to take the short extension table that came with the Biese fence to make a short outfeed table that will stay on the saw and have the slots for the miter gauge and sled cut in it instead of in this table. That way I can move this around to be in the best spot for what wood I'm cutting. I also made it where when I get a cabinet saw later, that I will keep the current saw for daddo work and make an "L" shape work station, and the newly built outfeed table will go behind the current saw making a big surface for outfeed for the cab saw. It will bridge the gap between the contractor saw and the RAS. By that time, I'll need to build a different assembly table.
Thanks for looking in. Hope your weekend is going well. Jim
 
Hi all!! Haven't been in the shop much this summer. No A/C makes it rough in the summer. But I have been doing some little things.
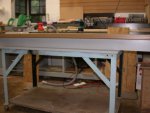
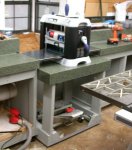
Started this about 4 weeks ago, I think. :huh: I used some left over header material for the base, and some 2X6 for the uprights. 2X4 for the upper frame, and MDF for the top. Top and upper frame covered with laminate to match the Multifunction benches. I fought last Sunday and today getting the Herc-U-Lift mounted. It wasn't designed to go in this small of a space! I had to cut some of the metal tubing so it would fit and work. At least it should work, I haven't tried rolling it out of the parking spot yet. But it does lift up off the leveling feet. So, without further adieu... dscn2006.jpgDSCN2008.jpg I do have a couple of things to finish up on this. I need two side wings attached that but up to the cabinets on either side. And I will eventually take the factory metal infeed and outfeed tables off, and build some out of MDF and laminate, like I did the wings on the SCMS table.

Next on the list will be the Kreg kit on a board that will drop into this spot. No cart for this as it will be light enough to literally drop into the hole, and rest on some runners. Thanks for checking in! Jim.
 
Looks great, Jim. Your whole countertop system is very slick.

I've got a spare Herc-U-Lift that was used in a failed attempt to put a mobile base on a Workmate. I don't really have a good place to store it, but I'm holding onto it in hopes that one day I can figure out a good use for it on something else. I'll have to remember how you made the base for your planer stand.
 
glad to see

your still cuttin wood jim, this humid weather isnt comfortable for anyone that doesnt have ac.. but its gonna get better soon we hope that gore is wrong right:D that lift station looks like it doing afine job for you.
 
Thanks guys! I still have about 5 different drop in stations I want to make for that area. One will be a down draft sanding station. More if I get to buy some more tools. :thumb::thumb:

Vaughn, don't get rid of it. I miscounted and gave one to the guy that gave me the 6" jointer. Still a great deal for me, but I had to rob the lift I had under the jointer to put on this thing. Not a major problem as the jointer won't go here, but I'll have to devise another way to move the jointer now. I still need to drop by the HD up by my parents and see if they happen to still have some. It's in a small town, and pretty much out of the way. I got one there a few years ago when they were 29.95. I've even toyed with the idea of getting some steel and making one myself. Thinking I could modify a stockade fence gate latch, but.... I even have plans drawn up for a mobile base for the DP that uses this same idea. But my DP found a good place out of the way.

Randy, ideas is what doing this has been all about for me. I work an idea out while typing about it, revise it by what others chime in with, and then try to implement it and see if it actually works. Early on at SMC when I mentioned my idea for this 24' multipurpose bench, one comment said it would be a waste of space. Man, was he wrong...I don't know where I'd be storing all the junk I have on this bench if it wasn't there!:rofl::rofl::rofl: But even that comment made me stop and re-evaluate my idea. I actually came up with more possibilities for it, so even a negative comment (not a bad or mean comment) was helpful.
Have a great day! Jim.
 
Last edited:
Well, long time no post!! I haven't done much in the shop for a while. I did build the light reflectors and put up some insulation in the finishing room. Need to finish the insulation, put up the vapor barrier I have, and go get some OSB and put it up. I just haven't been able to get myself to start the plastic since it's warmer now, and working under that really works up a sweat!. Seems to always try to rain on the weekends too. So I'm doing some little things, like the ZCI insert out of Corian that took longer than it should have...about 4 weekends worth of spare time. I need to get out there and clean up the floor from all that. I did clean all the cast iron surfaces this weekend, TS, including the fence rails, BS and DP. They were all showing a little surface rust from the high humidity. Looks lots better now.
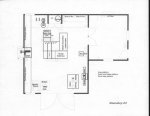
So I turn my thoughts to the future, and wonder what will need to change when I finally get to get a cabinet saw. I will keep the Ridgid 3612 to use for daddos, and as an outfeed table. I will have to build 2 new extension tables, one for each saw. But the big thing is how to arrange it all. I've come up with an idea that I'm hoping some of you will critique. Please let me know if I've missed something. The main room is 20' wide X 24' deep (concrete pad dimensions). For those that don't know, the west wall, on the left in the picture, has two long cabinets with tops that are independantly adjustable. These are at the same height as the TS. There is a three foot section in the middle that different carts roll into and dock for use. There will be a long list eventually, but right now I have the SCMS, the Planer, the RAS (when I cut the top shorter to fit), and eventually the little bench top 6" jointer I have will be mounted to go in there. Other items that will be made to drop in are: down draft sanding station, Kreg jig station, scroll saw station, and others further into the future. Attached is a floorplan. I show a 8" jointer on the southeast wall...that is still a dream, but if/when I can get it that's where it will go. It will be mobile to pull out so the infeed will be open to the big double shop door for longer boards.
I will have to move the DP from it's current position by the door to the finishing room to the north wall next to the Cyclone closet. The BS will move east against the wall, it is currently about 4' out from the wall. The northwest corner will have to stay as it is as it has a generic bench built in. Not going to move! The thin line, if visable, just off the north wall running all the way across the shop is where the original carport had a shed wall, and the floor is raised about 1 1/2" from the rest of the shop. Nice of them, huh? The grinder next to the DP will most likely relocate, that's just where it is at the moment.shop 2.6 scan.jpg
So anything look like it won't work? This will actually give me more walk around room than I currently have because of the BS moving against the wall...it is kind of in the middle of things at the moment. ;) Thanks! Jim.
 
Hi Jim,

Looking good. I was down in your neck of the woods today. My wife's favorite restaurant is in North Dallas, close to where 35E and 635 cross. You might have seen me waving as I passed by. :rofl::rofl::rofl:
 
Top